10
English
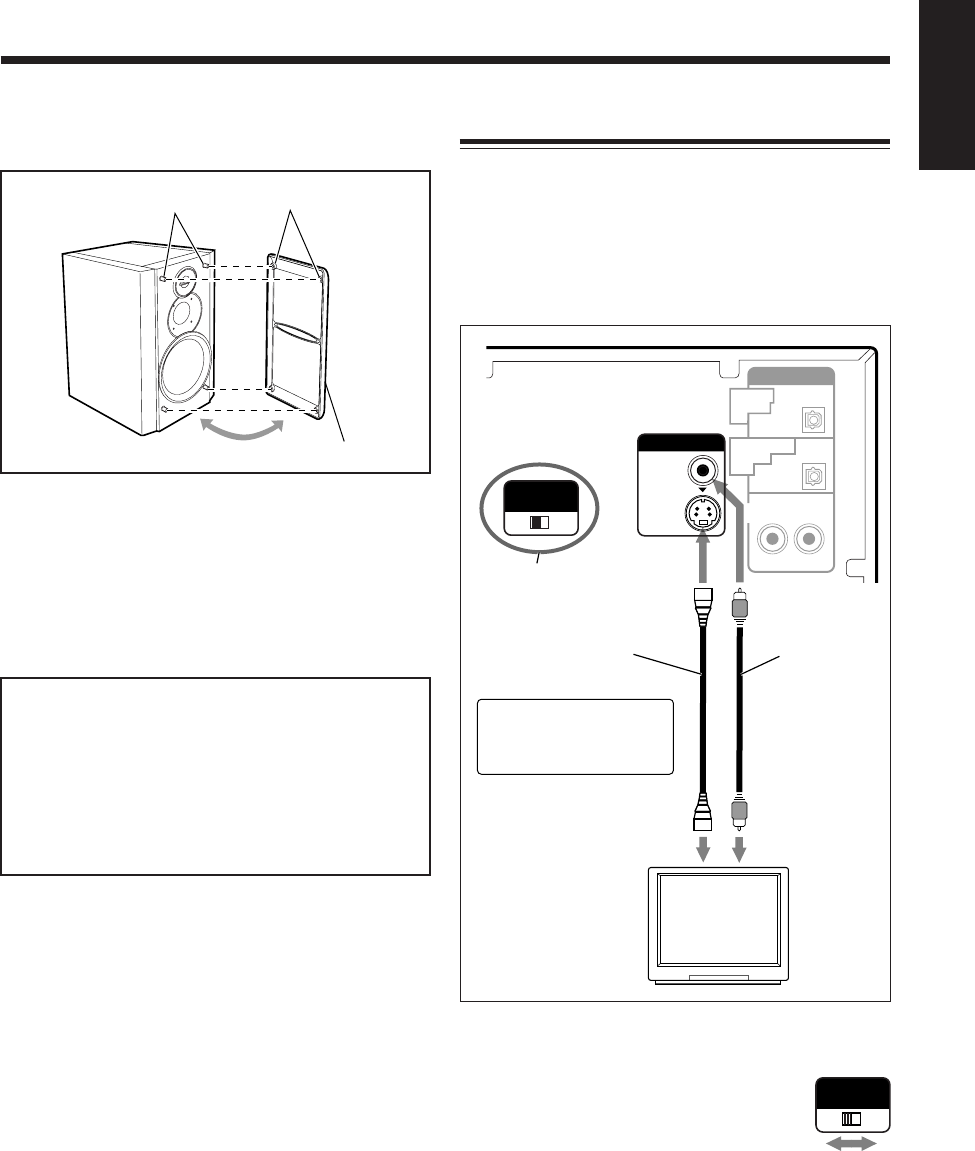
Holes
Projections
Speaker grille
To remove the speaker grilles
The speaker grilles are removable as illustrated below:
To remove the speaker grille, insert your fingers at the top
of the speaker grille, then pull towards you. Also pull the
bottom towards you.
To attach the speaker grille, put the projections of the
speaker grille into the holes of the speaker.
Caution on installation
This unit is compact but high powered, so it has a built-
in cooling fan which operates when the internal heat
rises due to continuous use and/or high volume level.
If you want to place speakers or any equipment on the
sides of the unit, leave a space of at least 1 cm between
the main unit and each other unit to obtain sufficient
cooling effect.
Connecting a TV
Connect your TV and this unit using the composite video
cord (supplied) or an S-video cord (not supplied).
• DVDs are protected by the copyguard system.
Connecting to a TV through a VCR (or to a TV with a
built-in VCR) may cause distortion of picture.
• You can also use JVC’s AV COMPU LINK control
system. (See page 93.)
To select the color system
This unit is compatible with the PAL and NTSC
systems. Set the VIDEO OUT SELECT switch
on the rear panel while in standby mode to
match the color system of your TV. Make sure
that the color system marked on the package of
a DVD, SVCD, or VCD matches that of your
TV.
Before playing back a disc, select the correct
“MONITOR TYPE” in the DISPLAY menu according
to the aspect ratio of your TV. See “To select the monitor
type” on page 15.
AUX
AUDIO
PCM
RIGHT LEFT
PCM/
STREAM
OPTICAL
DIGITAL
IN
DVD OPTICAL
DIGITAL
OUT
VIDEO
S-VIDEO
VIDEO OUT
SELECT
PAL NTSC
VIDEO OUT
Video cord
(supplied)
S-video cord*
(not supplied)
TV
To video inputTo S-video input
VIDEO OUT
SELECT switch
*Using an S-video cord
gives you a better
quality picture
VIDEO OUT
SELECT
PAL NTSC
EN08_17UX-A10DVD[UB].pm6 02.10.7, 8:08 AM10


