


82
English
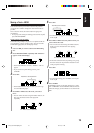
You can assign titles during play or recording
• During playback:
Entering a track title
The MD recorder repeats playback of the current track until you
press ENTER in step
6
on page 81. When you press ENTER,
the next track will be played.
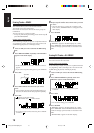
Entering a disc title
The MD recorder repeats playback of all tracks of the MD until
you press ENTER in step
6
on page 81. When you press
ENTER, the MD recorder enters the track title entry mode.
Entering a group title
The MD recorder repeats playback of the tracks in the group
until you press ENTER in step
6
on page 81. When you press
ENTER, the MD recorder enters the next group title entry mode.
• During recording:
Entering a track title
The MD recorder continues recording even after you press
ENTER in step
6
on page 81. When you press ENTER, a track
title is assigned to the track where you have started the title
entry. If you do not press ENTER before recording ends, the
track title assigned will be canceled.
• During Disc Synchronized Recording (see page 59):
You can assign the disc title, and 16 track titles one after another
as recording goes on. The track titles you have entered are
automatically assigned to the tracks recorded on the MD in
sequential order. If you enter 17th track title or more, they are
ignored.
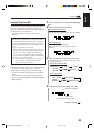
Changing the Title
You can make a correction or change the title.
1
Follow steps
1
to
4
on page 80.
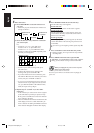
2
Select the character you want to correct, by pressing
Cursor 3/2.
• Make sure that the character you want to change is
flashing.
3
Press CANCEL to delete the character you have
selected in the above step.
• To erase all the characters, press CANCEL repeatedly
until all the characters are erased, then go to step 6 of
the current procedure.
4
Input the correct character, referring to step
5
on
page 81.
5
Repeat steps
2
to
4
of the current procedure to
correct more characters.
6
Press ENTER to finish correcting the title.
• If you want to correct another title, select another title
entry mode by pressing Cursor 3/2, press SET, then
repeat from step
2
of the current procedure.
• If you want to finalize the correction, go to the next
step.
7
Press MD 0 on the main unit to eject the MD.
“WRITING” and the MD REC indicator flash while
the changes you have made are recorded on the MD.
EN80_82UX-A10DVD[UB].pm6 02.10.7, 8:12 AM82