


Quest
®
2 Owner’s Manual 47
appendIx > addInG maps to your Quest 2
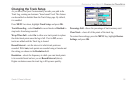
Adding Maps to Your Quest 2
You can purchase additional MapSource
®
maps from Garmin for
your Quest 2.
Purchasing Additional MapSource Maps
In order to unlock and use additional MapSource data, you need
your Unit ID number (see page 40) and serial number (see
page 51). After you unlock your map data, you can transfer it to
the Quest 2 using MapSource and your personal computer.
Note that the preloaded maps on your Quest 2 are protected and
cannot be erased. For example, if you add additional maps to your
Quest 2, you will not overwrite the original maps. If you load
additional maps to the Quest 2, these maps are not protected. The
additional maps will be overwritten each time you load new maps
to the unit.
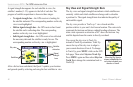
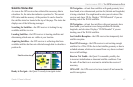
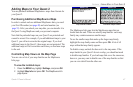
Controlling Map Views on the Map Page
You can view a list of your map families on the MapSource
Info page.
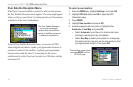
To view the installed maps:
1. Press the MENU key, highlight Settings, and press OK.
2. Highlight Map Info and press OK. The MapSource Info
page opens.
Map families loaded Individual maps loaded
The MapSource Info page lists the MapSource maps that are
loaded onto the unit. These are actually map families: each map
family may contain numerous smaller maps.
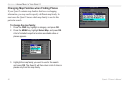
To see the smaller maps that make up the larger map family,
highlight the map family name and then press OK. A list of all
maps within that map family appears.
To disable a map, uncheck the box next to the map name. If the
maps loaded in your Quest 2 do not overlap, you should not need
to disable map families. If you load maps that cover the same area,
however, you may want to disable one of the map families so that
you can view detail from the other one.