Using the Position and Map Pages (continued)
As you head out, the Position Page will help you
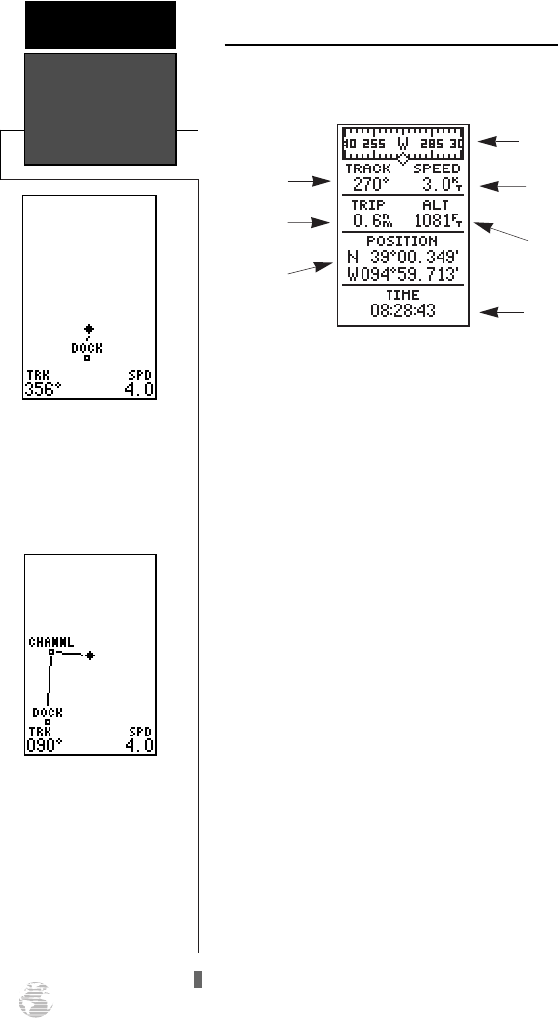
monitor your movement.
The direction you are moving (your track) and your
speed are displayed on the upper part of the page, just
below the graphic compass tape. The latitude, longitude
and approximate altitude of your position, along with a
resettable trip odometer, are continuously displayed in
the middle of the page, and the time of day is displayed
below.
Now let’s change the display to the Map Page and
watch the track log of our tour:
1. Press the
J
key to change from the Position Page
to the Map Page.
To get a larger view of the Map Page, lets change the
the zoom scale from .2 (default) to 1.0 nautical mile.
To select a larger zoom scale on the Map Page:
1. Press the
H
key until ‘1.0 n.m. zoom scale’ appears.
Your current position is shown as the diamond in
the middle of the screen. The dark circle below the dia-
mond represents the position you created, with the line
between the two showing your track.
1. Once you have reached an area that allows for gener-
al changes in direction without interfering in the pas-
sage of other boats, mark your current position again
and name this waypoint “CHANNL”. (See ‘Marking a
Waypoint’ on pages 10-11)
2. Next, make a moderate turn in any direction safe for
navigation and proceed for another 3 minutes.
Position & Map
Pages
GETTING
STARTED
12
The Map Page displays
your present position as a
diamond icon and provides
real-time graphic “bread-
crumb” display of your
track right on the screen.
The moving map’s default
screen orientation is track
up orientation. “Track up”
means that your current
direction of travel is always
up (or towards the top of)
the screen. It can also be set
for north up, or desired
track orientation through
the map setup page.
Altitude
Current Speed
Track Over
Ground
Graphic
Compass Tape
Tr i p
Odometer
Position
Display
12/24 Hour
Time
120XL Man RevB 7/10/98 10:54 AM Page 12


