


190-00067-25 Rev D 5-11
Functional Test
1. Turn the unit off.
2. Insert a Jeppesen NavData® card.
3. Turn the unit on without entering test mode. Verify the unit passes its self-test. A failure is indicated
by one of the messages listed in Table 3-1.
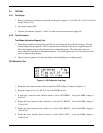
4. Verify the GPS 155XL correctly reads the NavData® card and indicates the type, effective date and
expiration date.
5. Press the ENT key and verify the Satellite Status Page is displayed.
6. Press the MSG key and verify the Message Page is displayed.
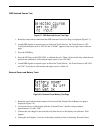
7. Press the Direct To key and verify the GO TO Page is displayed.
8. Rotate the inner function knob to select a letter or number on the display.
9. Press the CLR key and verify the selected letter/number disappears.
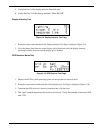
10. Press the NRST key. Verify a Nearest Waypoint Page is displayed.
11. Press the RTE key. Verify a Route Page is displayed and the annunciator next to the RTE key is on.
12. Press the WPT key. Verify the Select Waypoint Type Page is displayed and the annunciator next to
the WPT key is on.
13. Press the CRSR key and verify APT? is selected.
14. Rotate the outer function knob clockwise and verify VOR? Is selected.
15. Press the NAV key. Verify a Navigation Page is displayed.
16. Turn the unit off.
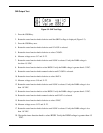
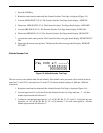
Satellite Tracking Test
The Satellite Tracking Test ensures that the GPS 155XL has current almanac information and is able to lock onto
a sufficient number of satellites to provide a position. This test also verifies that the signal strength of the
satellites received is at an acceptable level.
1. Turn the unit off.
2. Connect the unit to a GA56 antenna with coaxial cable having a 10 ±1 dB loss @ 1.5 GHz. Mount
antenna outside with a clear view of the sky. Attenuation pads must not be used, the unit supplies the
GA56 with DC power.
3. Turn the unit on and go to the Satellite Data Page (see pilot's guide for instructions).