


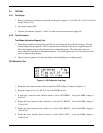

5-2 190-00067-25 Rev D
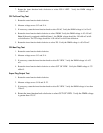
5.3 MEMORY BATTERY REPLACEMENT
The GPS 155XL uses a built-in lithium battery to maintain user waypoints/settings stored in RAM. This battery
has an operational life of up to five years. Should the battery require replacement, as indicated by the ‘Memory
Battery Low’ message, disassembly of the unit will be required to access the battery. When replacing the
memory battery, all user waypoints/settings may be lost, and if this occurs, the message ‘Stored Data Lost’ will
be displayed. The unit must then be attached to an antenna, allowed to search the sky, and collect new almanac
data before it will be usable again. This process may take twenty to thirty minutes. Before beginning
replacement of the memory battery, transfer all waypoints and routes to a user data card so that they may be
transferred back to the unit following battery replacement. This process is described in the GPS 155XL Pilot’s
Guide.
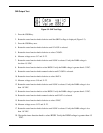
1. Remove Covers as described in paragraph 4.3.1.
2. Open Altitude Chassis Subassembly.
3. Carefully turn unit over and remove the CPU Board Bottom-Side Shield Cover.
4. Remove all electrical grounds from the unit (this will prevent the battery from shorting out
when using a grounded tip soldering iron).
5. Unsolder the three Battery Leads from the bottom side of the CPU Board.
6. Carefully remove the Battery by pulling it out from the top side of the CPU Board. The battery leads
are welded to the battery and cannot be removed.
7. Install a new Battery and solder the leads from the bottom side of the CPU Board.
8. Turn the unit on.
9. Press ENT to accept normal mode operation.
10. Press ENT again to accept the Database Page.
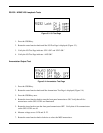
11. Verify the ‘Memory Battery Low’ message does not appear by pressing MSG key.
12. Turn the unit off and carefully turn the unit over.
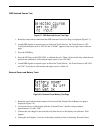
13. Verify the memory battery voltage from test point to ground is at least +2.9 V (see Figure 3-2).
14. Install the CPU Board Bottom Shield Cover.
15. Install the top and bottom covers.