


12
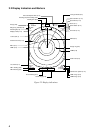
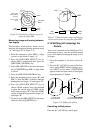
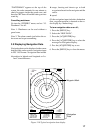
3.2 Selecting the Presentation
Mode
This radar provides four presentation modes:
head-up, course-up, north-up and true motion.
1. Press the [MENU] key.
2. Operate the omnipad to select “MODE”.
3. Press the [ACQ/ENTER] key.
With heading sensor connection the display
and the display mode indication at the top left-
hand corner of the display change in the se-
quence of HU (heading up), CU (course up),
NU (north up) and TM (true motion) when
the [ACQ/ENTER] key is pressed. If there is
no heading sensor connection, the display
mode is always HU.
4. Press the [MENU] key to close the menu.
Note: The radar begins operation with last se-
lected display mode (except course up) when-
ever the unit is turned on. Note however that
head up is selected when course up was the
last used mode.
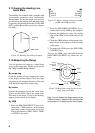
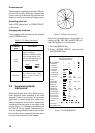
Head up
The picture is oriented so the heading line is
at the top of the display. This mode is useful
for navigation in congested waters.
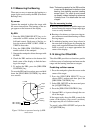
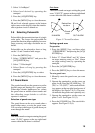
Course up
The course up mode shows ship’s heading by
the heading line, at the top of the display. To
get heading desired, steer vessel in direction
desired, and then show “CU” at the top left-
hand corner of the display.
North up
North is at the top of the display and the head-
ing line moves with ship’s heading. This mode
is useful for determining ship’s position and
as a navigation monitor on a nautical chart.
The picture is stabilized against yaw of ves-
sel, thereby reducing of target echoes.
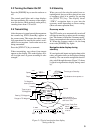
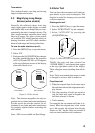
3.1 Basic Menu Operation
The menu mostly contains less-often used
functions which once preset do not require
regular adjustment. To open or close the menu,
press the [MENU] key. You can select items
on the menu with the omnipad. The complete
menu appears on page AP-1.
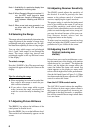
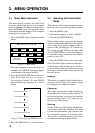
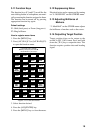
1. Press the [MENU] key to display the main
menu.
SSel by omnipad & press ENT.S
RINGS
EBL
OFFSET
SHIFT
ZOOM
MODE
DISP
DATA
ECHO
TRAIL
ECHO
STRTCH
ARP-10
MENU
OTHER
MENU
Change brill
from 3 to max.
Figure 3-1 Main menu
2. Press the omnipad to select the item. For
example, select RINGS. A message appears
at the bottom of the menu window.
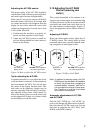
3. Press the [ACQ/ENTER] key to select set-
ting. Each time this key is pressed,
the message changes. For the RINGS
menu, the message sequence is as shown
below.
Change brill from Off to 1.
Change brill from 1 to 2.
Change brill from 2 to 3.
Change brill from 3 to max.
Change brill from max to Off.
Figure 3-2 Messages for RINGS menu
4. Press the [MENU] key to close the menu.
3. MENU OPERATION