


ease the holder out of the alternator. Inspect
the brushes and if worn below the specified
minimum length, they must be renewed.
7 Disconnect the brush leads by unsoldering
or carefully cutting them.
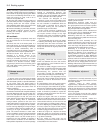
8 When soldering the new brush leads, do
not allow solder to run down them or their
flexibility will be ruined.
9 When inspecting or renewing brushes,
check the surface of the slip rings. Clean them
with solvent or if they are very discoloured,
use very fine glasspaper.
6 Voltage regulator
1 This is of integral type and is part of the
brushholder assembly.
2 No provision is made for adjustment or
overhaul.
7 Starter motor -
description and testing
2
1 The starter motor may be one of two
different makes. Both are of pre-engaged
type.
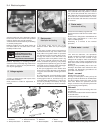
2 This type of starter motor incorporates a
solenoid mounted on top of the starter motor
body. When the ignition switch is operated,
the solenoid moves the starter drive pinion,
through the medium of the shift lever, into
engagement with the flywheel starter ring
gear. As the solenoid reaches the end of its
stroke, and with the pinion by now partially
engaged with the flywheel ring gear, the main
fixed and moving contacts close and engage
the starter motor to rotate the engine.
3 This pre-engagement of the starter drive
does much to reduce the wear on the flywheel
ring gear associated with inertia type starter
motors.
4 If the starter fails, some fault-finding can be
done with it still on the car. Check the ignition
warning light comes on, and does not go out
when the starter is switched on. If it goes out,
the fault is probably in the battery. If it stays
bright, get an assistant to work the switch,
whilst listening to the starter. Listen to find out
if the solenoid clicks into position. If it does
not, pull off the solenoid wire, and check it
with a test bulb. If the wire is live when the key
is turned, but the solenoid does not move,
take off the starter and remove it to the bench
for overhaul.
8 Starter motor -
removal and refitting
1
1 Disconnect the battery negative lead.
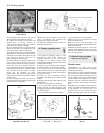
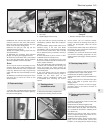
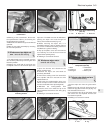
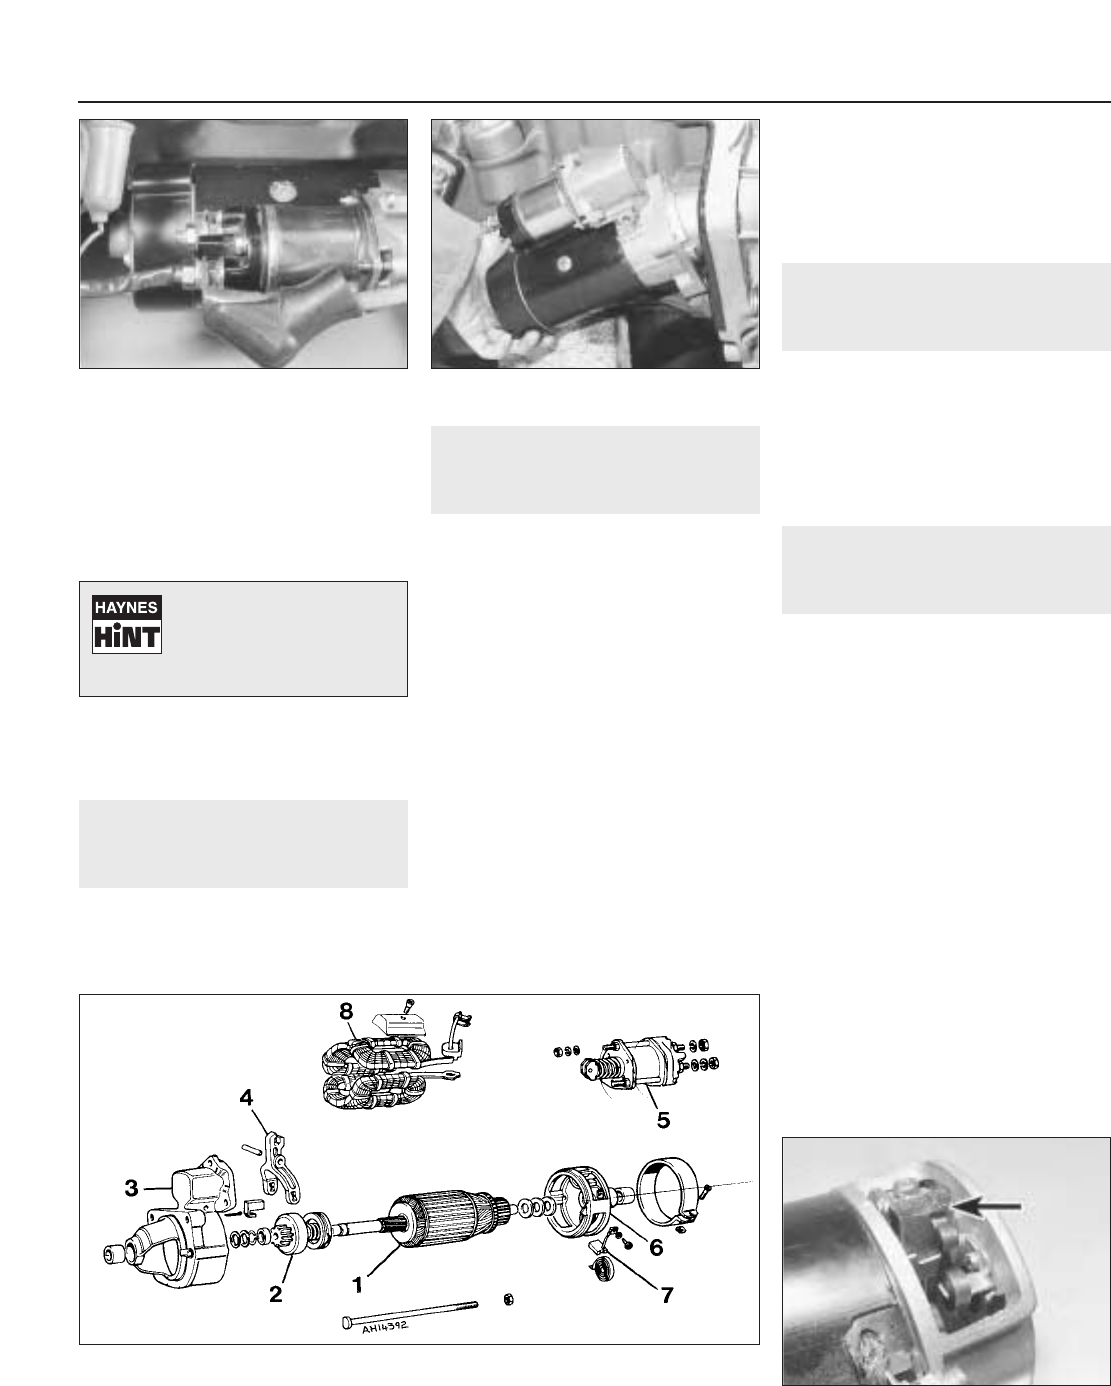
2 Disconnect the lead from the starter motor
(photo).
3 Unscrew the fixing bolts and withdraw the
starter motor, downwards on 1116 cc and
1301 cc models (photo).
4 Refitting is a reversal of the removal
procedure.
9 Starter motor - overhaul
3
1 As with the alternator, the operations
should normally be limited to renewal of the
brushes. If the unit has covered a high
mileage it will usually be more economical to
purchase a new or factory-reconditioned one
rather than renew several components of the
original unit.
2 Owing to the possibility that a fault can
develop in the starter motor solenoid or drive
assembly, full dismantling procedures are
given later in this Section.
Brush - renewal
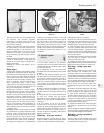
3 Slide off the cover band.
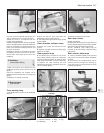
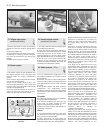
4 Using a hooked piece of wire, pull up the
springs so that the brushes can be withdrawn
and their lengths checked for wear. If they
have worn below the specified minimum
length, renew them by extracting the brush
lead connecting screws (photo).
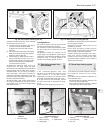
Solenoid
5 Disconnect the field connecting wire from
the solenoid.
6 Unscrew the bolts which hold the solenoid
to the end-frame.
7 Unscrew the yoke tie-rod nuts.
9•4 Electrical system
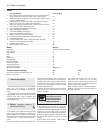
9.4 Starter motor brush partly withdrawn
8.2 Starter motor connections 8.3 Removing starter motor
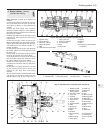
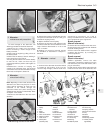
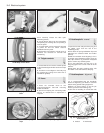
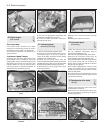
Fig. 9.2 Exploded view of typical starter motor (Sec 9)
1 Armature
2 Drive pinion/clutch
3 Drive end bracket
4 Shift lever
5 Solenoid
6 Brush endplate
7 Brush
8 Field windings
Gripping the brush leads with
a pair of pliers to act as a
heat sink will prevent heat
transfer to the internal
components of the alternator.