


133 Drain the engine oil from the sump into a
suitable container. Disconnect the lead from
the engine oil level sensor in the sump.
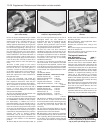
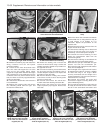
134 Where applicable, unscrew and remove
the bolts retaining the gear linkage mounting
bracket and the clutch housing lower cover
bolts. Remove the cover from the clutch
housing.
135 Unscrew the sump retaining nuts and
bolts, then lower and remove the sump.
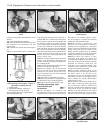
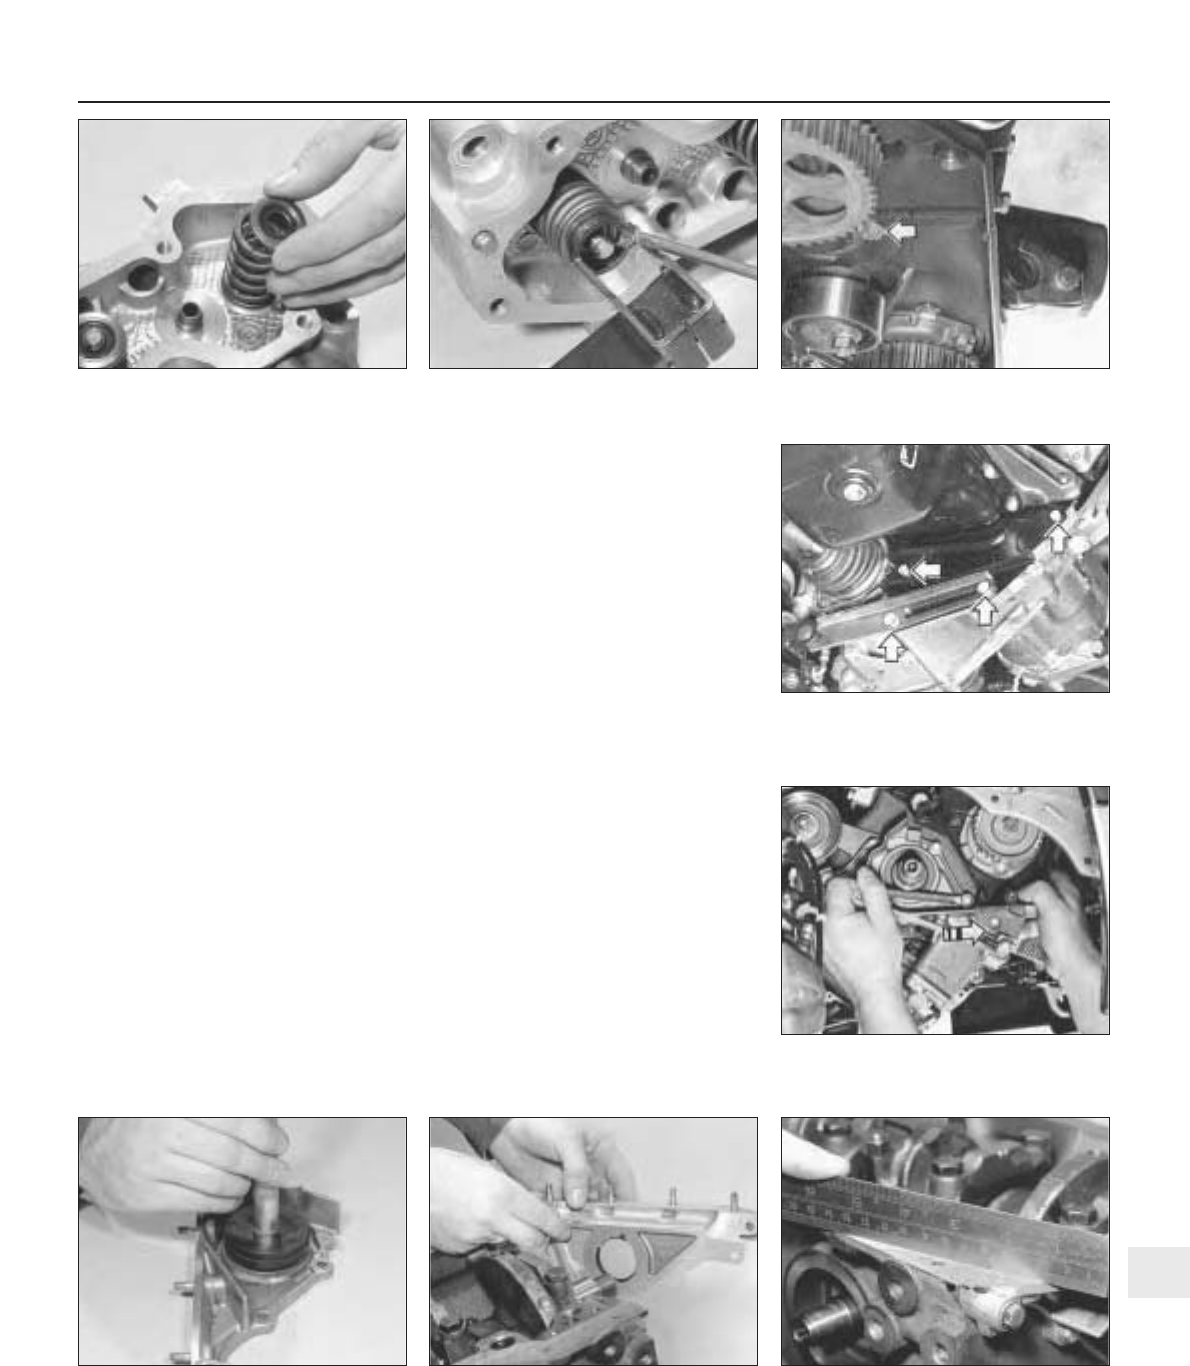
136 Unscrew the timing belt rear cover
retaining bolts.
137 Move the timing belt rear cover towards
the front of the car to gain access to the
retaining bolt and then unscrew and remove
the three oil seal housing retaining bolts.
Remove the crankshaft front oil seal housing.
138 Note the orientation of the seal in its
housing prior to its removal. Support the
underside of the housing and carefully drive
the old oil seal from the housing using a
punch or a tubular drift of suitable diameter.
An alternative method is to punch or drill a
small hole in the face of the oil seal (but take
care not to drill into the housing) and insert a
self-tapping screw into the seal. Withdraw the
seal by gripping the screw with pliers and
pulling the seal from the housing. If necessary,
fit a second screw into the seal on the
opposite side to provide an even pull.
139 Clean the mating faces of the housing
and the front of the crankcase using a suitable
scraper.
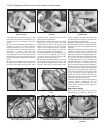
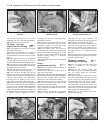
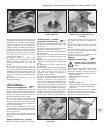
140 Drive or press the new seal into position
in the housing in the reverse order of removal,
but ensure that it is correctly orientated as
noted during removal (photo).
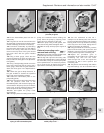
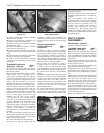
141 Refit the oil seal housing with a new
gasket and tighten the retaining bolts to the
specified torque setting (photos).
142 Refit the sump as described later in this
Section using a new gasket. Tighten its
retaining nuts and bolts to the specified
torque. Refit the clutch cover and the gear
linkage mounting bracket.
143 Fit the new timing belt, adjust its tension
and refit the crankshaft pulley as described
earlier in this Section.
144 Reconnect the remaining components
that were detached during removal in the
reverse order and top up the engine oil level to
complete.
Crankshaft rear oil seal -
removal and renewal #
145 If the engine is still in the car, disconnect
the battery negative lead.
146 Remove the flywheel as described in the
next sub-Section.
147 Punch or drill a small hole in the rear face
of the rear oil seal (but take care not to drill
into the housing) and insert a self-tapping
screw into the seal. Withdraw the seal by
gripping the screw with pliers and pulling it
from the housing. If necessary, fit a second
screw into the seal on the opposite side to
provide an even pull.
148 Clean the seal housing, then locate the
Supplement: Revisions and information on later models 13•45
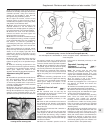
Fig. 13.18 Timing belt rear cover bolt
(arrowed) - 1372 cc ie and Turbo ie engines
(Sec 7B)
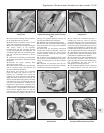
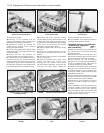
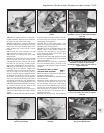
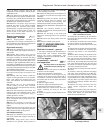
7B.130J Compress spring and refit the split
collets
7B.130I . . . and cap
7B.140 Driving a new crankshaft front oil
seal into its housing
7B.141B . . . ensuring it is flush with the
face of the cylinder block
7B.141A Refit the crankshaft front oil seal
housing . . .
Fig. 13.20 Removing the timing belt rear
cover on the 1372 ie and Turbo ie engines
(Sec 7B)
Fig. 13.19 Unscrew the bolts at the points
indicated to release the gear linkage
mounting bracket - 1372 cc ie and Turbo ie
engines (Sec 7B)
13