


Door closure sensor
117 The sensor consists of a microswitch
within the lock. The switch actuates the
warning lamp according to whether the lock is
in the open or closed mode.
Check control system sensors -
testing
Brake fluid level sensor
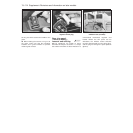
118 With the fluid level correct, switch on the
ignition and depress the centre of the
reservoir cap. If the sensor switches are
working correctly, then “FAULT” should be
indicated on the check panel.
Coolant level sensor
119 With the coolant level in the expansion
tank correct, switch on the ignition and then
pull the wiring plug from the sensor. “FAULT”
should be indicated on the check panel. If it is
not, then it is the panel which is faulty.
120 An ohmmeter should be used to check
for continuity, holding the float in both the full
and low level positions.
Engine oil level sensor
121 With the oil level correct, disconnect the
wiring plug from the dipstick, and then bridge
the plug terminals (not dipstick side) with a 12
ohm resistor. Switch on the ignition.
122 If the red light on the check panel goes
out, then the fault is due to the sensor.
123 If the light stays on, then it is the check
panel module which is faulty.
Door closure sensor
124 Any fault in the lock microswitch can best
be detected using an ohmmeter.
16 Suspension
Front anti-roll bar -
removal and refitting ™
1 A front anti-roll bar is fitted to the 1301 cc,
1372 cc ie and 1372 cc Turbo ie engined
models. Removal of the bar on all models is
as follows. Firstly loosen off the front
roadwheel bolts, then raise the front of the
car, securely support it on axle stands and
remove the front roadwheels.
2 Disconnect the two gearchange rods from
the transmission.
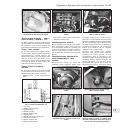
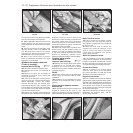
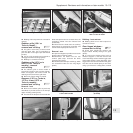
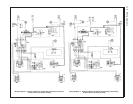
3 Unbolt and disconnect the anti-roll bar
insulating clamps from the floorpan (photo).
4 Unbolt the end links from the track control
arms and withdraw the anti-roll bar (photo).
5 Refitting is a reversal of removal, but only
tighten the nuts and bolts to the specified
torque with the car parked on level ground,
with four passengers and 40 kg of luggage
inside.
Suspension strut - later models
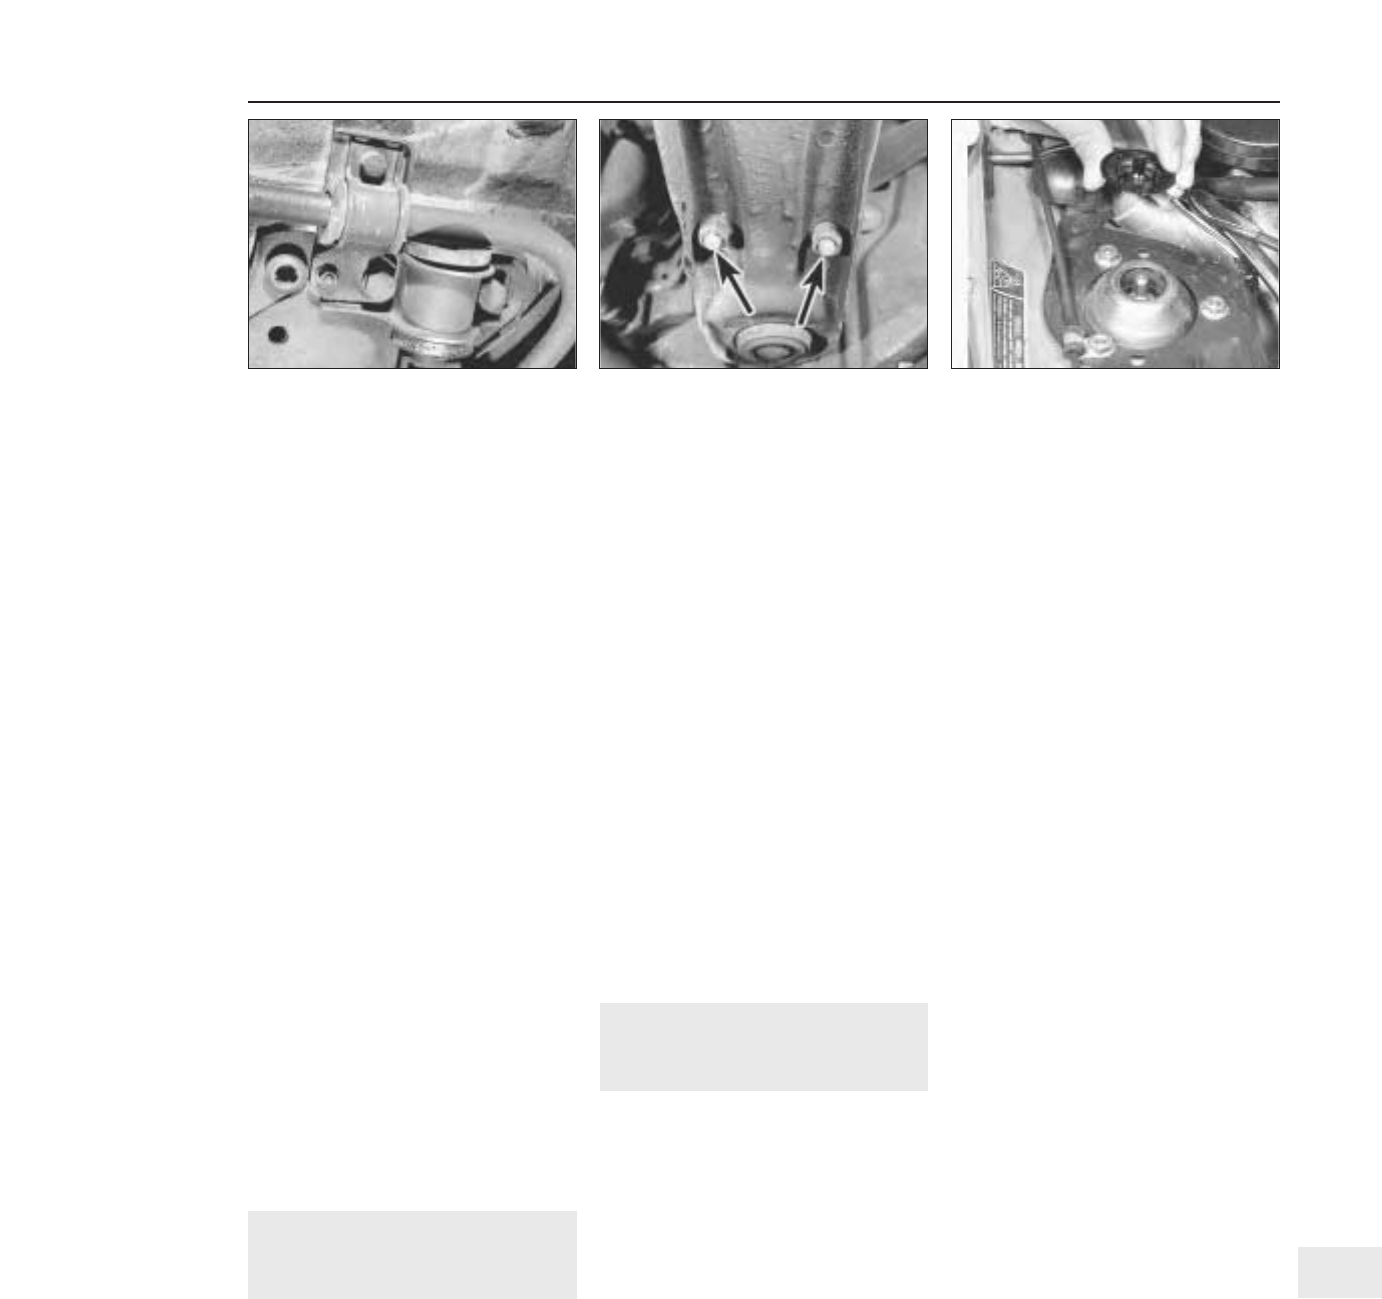
6 The suspension strut upper mounting nuts
on later models also secure the brackets for
the mounting of ancillary components such as
the fuel filter, fuel system relays and fuses,
etc. (depending on model).
7 When removing the suspension strut units,
it will therefore be necessary to detach and
support these brackets and their fittings
(photo).
17 Bodywork
Plastic components
1 With the use of more and more plastic
body components by the vehicle
manufacturers (e.g. bumpers, spoilers, and in
some cases major body panels), rectification
of more serious damage to such items has
become a matter of either entrusting repair
work to a specialist in this field, or renewing
complete components. Repair of such
damage by the DIY owner is not really
feasible owing to the cost of the equipment
and materials required for effecting such
repairs. The basic technique involves making
a groove along the line of the crack in the
plastic using a rotary burr in a power drill. The
damaged part is then welded back together
by using a hot air gun to heat up and fuse a
plastic filler rod into the groove. Any excess
plastic is then removed and the area rubbed
down to a smooth finish. It is important that a
filler rod of the correct plastic is used, as
body components can be made of a variety
of different types (e.g. polycarbonate, ABS,
polypropylene). Damage of a less serious
nature (abrasions, minor cracks, etc.) can be
repaired by the DIY owner using a two-part
epoxy filler repair material. Once mixed in
equal proportions, this is used in similar
fashion to the bodywork filler used on metal
panels. The filler is usually cured in twenty to
thirty minutes, ready for sanding and
painting.
2 If the owner is renewing a complete
component himself, or if he has repaired it
with epoxy filler, he will be left with the
problem of finding a suitable paint for
finishing which is compatible with the type of
plastic used. At one time the use of a
universal paint was not possible owing to the
complex range of plastics encountered in
body component applications. Standard
paints, generally speaking, will not bond to
plastic or rubber satisfactorily. However, it is
now possible to obtain a plastic body parts
finishing kit which consists of a pre-primer
treatment, a primer and coloured top coat.
Full instructions are normally supplied with a
kit, but basically the method of use is to first
apply the pre-primer to the component
concerned and allow it to dry for up to
30 minutes. Then the primer is applied and
left to dry for about an hour before finally
applying the special coloured top coat. The
result is a correctly coloured component
where the paint will flex with the plastic or
rubber, a property that standard paint does
not normally possess.
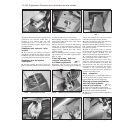
Rear view mirrors ¡
Interior
3 The mirror is of safety type, “breaking” off
its ball fixing upon impact from a front seat
occupant.
4 To remove the mirror, grip the head and
Supplement: Revisions and information on later models 13•111
16.7 Suspension strut upper mounting
nuts, showing bracket and cable clip on
the 1372 cc ie model
16.4 Anti-roll bar fixing nuts (arrowed)16.3 Anti-roll bar clamp
13