


Destinator 6 11
Getting Started
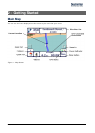
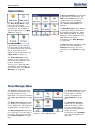
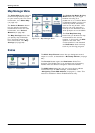
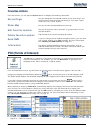
Settings Menu
The Settings button, at the bottom of the Options menu, lets you configure your
settings options.
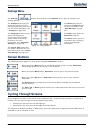
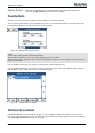
The Prompts button lets you
specify the types of voice or
visual prompts that you want to
use. For more information, see
" Prompts (on page
33)".
The Language button lets you
select the language for
announcing travel prompts,
street names, and driving
directions. For more
information, see “Language
Settings (on page
33)”.
The Look & Feel button lets
you select a different skin. For
more information, see “Look &
Feel Settings (on page
33)”.
Figure 12 - Settings Menu
The GPS button lets you
configure the GPS settings.
For more information, see
"GPS Settings (on page
34)".
The Help button opens the
Destinator help file.
The About button opens an
information box, providing
version and copyright
information.
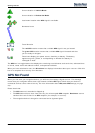
Screen Buttons
The following buttons appear on many of the navigation Destinator screens.
When you tap the Next button for a selected address, group, or place, Destinator
automatically opens the next screen in the sequence.
When you tap the Back button, Destinator returns you to the previous screen.
When you tap the GO button, Destinator calculates the route to your selected
destination.
The Actions button provides a list of command options available for the selected
address or place.
The Save, OK, or Done buttons confirm your value preferences and returns you to the
menu or map.
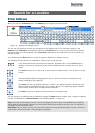
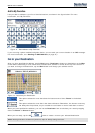
Cycling Through Screens
Every navigation function in the system, such as Address, POI, or My Favorites consists of a sequence of
screens. You can cycle through the screen sequences by either:
Selecting an item from the list and tapping it.
Selecting an item form the list and tapping the Next button.
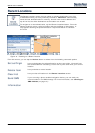
The sequence ends with the Show on Map screen, where the destination is displayed and the GO button is
available for you to calculate a route.
Note: You must first select an item for Actions, Next and Back buttons to be enabled.