


06 Maintenance and specifications
205
Wheels and tyres
06
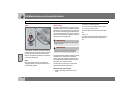
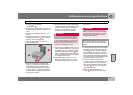
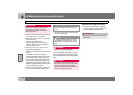
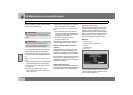
Sealing punctured tyres
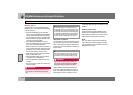
For information on the function of the parts,
please refer to the illustration on page 204.
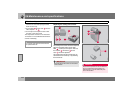
1. Open the lid of the emergency puncture
repair kit.
2. Detach the decal for maximum permit-
ted speed and affix it to the steering
wheel.
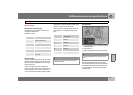
3. Check that the switch is in position 0
and locate the cable and the air hose.
4. Put on the gloves.
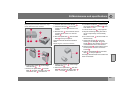
5. Unscrew the orange cap and unscrew
the bottle’s stopper.
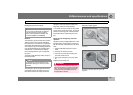
6. Screw the bottle into its holder.
7. Unscrew the wheel’s dust cap and
screw in the air hose valve connection
to the bottom of the thread on the tyre’s
air valve.
8. Plug the cable into the 12 V socket and
start the car.
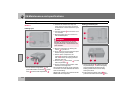
9. Flick the switch to position I.
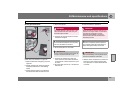
10.Inflate the tyre for 7 minutes.
11.Switch off the compressor to check the
pressure on the pressure gauge. Mini-
mum pressure is 1.8 bar and maximum
is 3.5 bar.
G014338
WARNING
The sealing fluid can irritate the skin. In the
case of contact with skin, wash away the
fluid with soap and water.
NOTE
Do not break the bottle seal. The seal is bro-
ken when the bottle is screwed in.
IMPORTANT
Do not unscrew the bottle from its holder af-
ter use as surplus fluid could run out.
WARNING
Never stand next to the tyre when the com-
pressor is running. If cracks or unevenness
arise then the compressor must be
switched off immediately. The journey
should not be continued. Contact an au-
thorised tyre centre.
NOTE
When the compressor starts the pressure
can increase up to 6 bar but the pressure
drops after approximately 30 seconds.
IMPORTANT
Risk of overheating. The compressor must
not run for more than 10 minutes.