


Installation & Programming Manual FX & VFX Series Inverter/Charger System Copyright 2003 OutBack Power Systems, Inc.
900-0027-1 19009 62
nd
Ave NE, Arlington WA 98223 USA
Page 52 Rev 7.2 08/26/05 Tel 360 435 6030 Fax 360 435 6019
MATE SCREENS
Advanced Screens
The ADVANCED menu section allows adjustment of all the settings involved with the operation of the FX. Changes made to these
settings are stored internally in non-volatile memory inside of the FX – the settings are not lost when the MATE is removed or battery
power is disconnected.
Some settings appear both in the SETUP and in the ADV menus. Changes made to these settings in one area will cause the same
changes to occur in the other area. The settings are provided in both menus to make it more convenient for the FX programmer by
giving access to all of the settings in the advanced menu.
Access to the settings in the advanced menu is restricted through the use of a password. This password is required to view and adjust
the settings. Once the password has been entered, all ADVANCED categories can be adjusted without having to re-enter the
password. If the advanced menu is exited and re-entered, the password must be re-entered, however. Use of the “Hot” keys AC IN
and INV is allowed from the advanced menu and selecting OK from these screens will return you to the same point in the advanced
menu.
The password for the FX is currently fixed to the same value for all of the FX’s.
PASSWORD CODE: 1 4 1
MAIN----------------
6:54:42P
SUM STATUS SETUP ADV
↓
ADV/SETTINGS/WARNING
changes made could
adversely effect
system performance
↓↓↓↓
ADV/PASSWORD--------
enter the password:
132
ENTER INC DEC EXIT
↓
ADV-----------------
choose product:
FX MX MATE MAIN
↓
ADV/FX/PAGE1--------
choose category:
ADV INV CHGR PG2
↓
ADV/FX/PAGE2--------
choose category:
PG1 GRID GEN PG3
↓
ADV/FX/PAGE3--------
choose category:
PG2 AUX STACK PG4
↓
ADV/FX/PAGE3--------
choose category:
PG3 SELL CAL MAIN
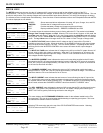
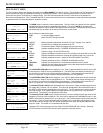
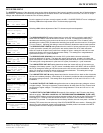
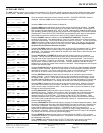
The MAIN screen is where the menu system starts. The four words in the bottom line of the display
correspond to the four buttons located below the display. The word in
BOLD on the bottom line
indicates the selection used to advance the display to the next screen. Pressing the left two buttons
simultaneously from anywhere in the menu will return you to this screen.
Selecting
<ADV> brings up a warning message. Please read the message. Pressing any of the four
keys below the display advances the display to the password screen.
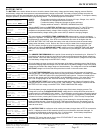
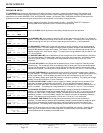
Entering the correct password number is done by pressing the <INC> key to increase the number
or the
<DEC> key to decrease the number. Once the number shown matches the password code
(141), press the key below the word <ENTER>. To leave the advanced menu area without making
any changes, press EXIT.
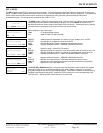
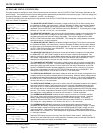
Following the password screen is a screen that allows selection of the OutBack product type.
Selecting
<FX> allows adjustment of the FX’s advanced programming. Selecting MX will allow
access to the advanced sections of any MX-60’s connected to the system (through a HUB). Selecting
MATE will allow access to the MATE’s advanced screens. Selecting MAIN returns the user to the
MAIN menu.
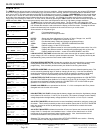
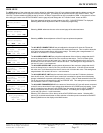
There are eight categories of settings in the FX:
INV Allows adjustment of the INVERTER settings and operation
CHGR Allows adjustment of the CHARGER settings and operation
GRID Allows adjustment of the AC input settings and operation if the FX’s input is set to GRID
in the SETUP/FX/INPUT “ac transfer control” screen (see previous page)
GEN Allows adjustment of the AC input settings and operation if the FX’s input is set to GEN in
the SETUP/FX/INPUT “ac transfer control” screen (see previous page)
AUX Allows adjustment of the AUXILIARY output settings and operation
STACK Allows adjustment of the master/slave settings for multi-FX systems
SELL Allows adjustment of the Grid-Tie settings and operation
CAL Allows adjustment of the voltage calibration measurements to improve operation
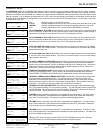
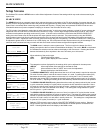
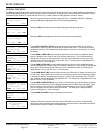
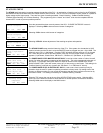
Selecting ADV will send the user back one screen to the “choose product” screen in the advanced
menu. PG2 will advance the user to page 2 of the advanced menu. PG3 will advance the user to
page 3 of the advanced menu. PG4 will advance the user to page 4 of the advanced menu.
Selecting MAIN will return the user to the MAIN screen.