


32
Create a Route
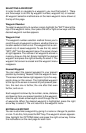
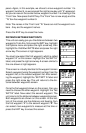
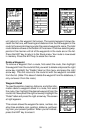
To create a route, first press the MENU key, highlight
the “PLAN/EDIT ROUTES” label, and press the right
arrow key. The screen shown at right appears.
This unit can store up to 20 routes. Route number one
shows on this page. If you wish to create a route using
a different number, simply press the left or right arrow
keys until the desired route number appears. In this
example, however, we’ll use route number one.
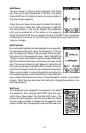
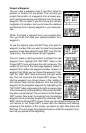
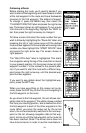
At the bottom of this menu is the “Edit Name” label. If
you wish to name the route, highlight that label, then
press the right arrow key. Use the arrow keys to name
the route, (you can use up to eight characters in the
name) then press the ENT key when you’re finished.
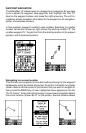
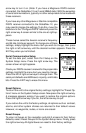
To add waypoints to the route, highlight the “Edit Route”
label and press the right arrow key. The screen shown
at right appears. This is the waypoint list screen. This
shows all of the waypoints that form the route. The first
waypoint is highlighted at the top of the screen. To se-
lect the first waypoint in the route, simply press the
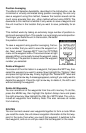
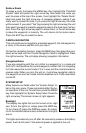
right arrow key. A new menu appears as shown below.
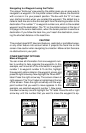
This menu lets you go to the waypoint selection menu,
delete a waypoint from the route, or see details about
any waypoint in the route. Since we want to add a way-
point to the route, press the right arrow key on the “ADD
WPT” label. The screen shown at the top left on the
next page appears.
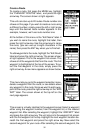
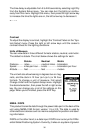
This screen is virtually identical to the waypoint screen Select a waypoint
either using the waypoint number, from the waypoint list, or the nearest
waypoint list. After selecting the waypoint, highlight the “ADD WPT” label
and press the right arrow key. The unit returns to the waypoint list screen
with the first waypoint at the top. Highlight the next waypoint location be-
neath the first waypoint and press the right arrow key. Now select the
second waypoint for your route. After selecting the second waypoint, the