


28
Navigating to a Waypoint using the Plotter
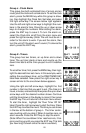
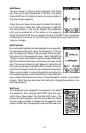
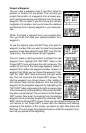
The unique “birds-eye” view used by the plotter gives you an easy way to
navigate to a waypoint. On the plotter screen shown above, the diamond
with a cross in it is your present position. The box with the “S” in it was
your starting location when you recalled the waypoint. The dotted line is
called a track line and is the shortest path from the starting location to the
destination. The number “1” is waypoint number one, which is the recalled
waypoint and the destination. The “D” on the plotter screen at the top of
this page is the cursor destination, when the cursor position is used as a
destination. If you follow the track line, you’ll reach the destination, cover-
ing the shortest distance in the least time.
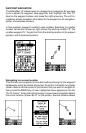
CAUTION!
This product does NOT take land features, restricted or prohibited areas,
or any other feature into account when it projects the track line on the
screen. Use caution when navigating to a location. Make certain there are
no obstructions in your path.
OTHER WAYPOINT OPTIONS
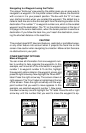
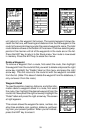
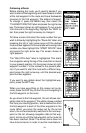
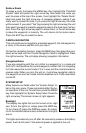
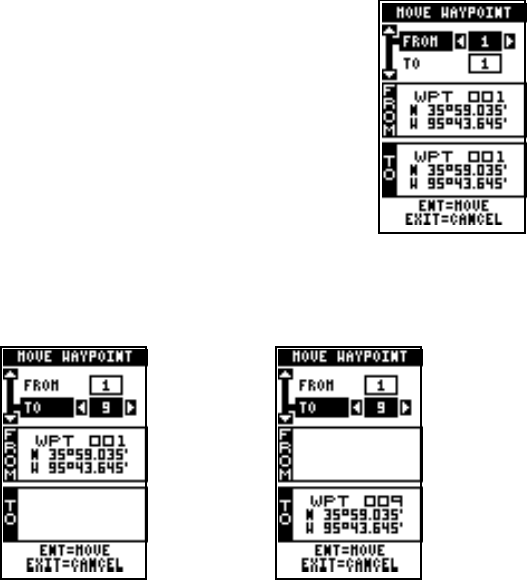
Move a Waypoint
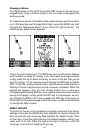
You can move all information from one waypoint num-
ber to another to help organize the waypoints. In this
example, we’ll move all of the information in waypoint
number 1 to waypoint number 9. To do this, highlight
the waypoint options label on the waypoint screen and
press the right arrow key. Now highlight the “Move WPT”
label. Press the right arrow key. The screen shown at
right appears. The “From” label is highlighted at the top
of the screen. Press the right arrow key until the way-
point number that you want to move appears. In this
example, we selected waypoint number 1. Now press
the down arrow key once to highlight the “To” label. Press the left or right
arrow key until the number that you want to move the waypoint to ap-