


14
GRIDS
RINGS BOTH
The course-up mode locks the top of the screen into the original bearing
to the waypoint when navigation was first started. (See the navigation
section for more information on course, track, and waypoint navigation.)
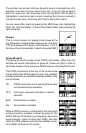
To select a plotter orientation, highlight the “ROTATE” label on the “Plotter
Options” menu. Press the right or left arrow keys until the desired mode
appears. Press the EXIT key to erase the menu.
PLOT TRAILS
The line extending from the present position is your
plot trail, or path you’ve taken. The unit automatically
saves the current plot trail in memory when you turn it
off.
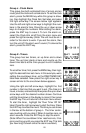
Clear Trail
To erase the current plot trail from the screen, select
Clear Trail from the Plotter Options menu. A message
appears, asking if you really want to erase the plot trail.
Follow the instructions on the screen. When the trail is
erased, the unit returns to the plotter screen.
Record Trail
To stop the plot trail from recording on the plotter screen, select “RECORD”
from the plotter options menu, then press the left arrow key. To start re-
cording the trail again, repeat the above steps, then press the right arrow
key.
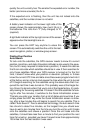
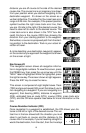
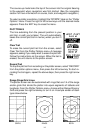
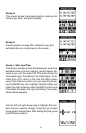
Range Rings/Grid Lines
The plotter screen can be customized with rings that are 1/4 of the range
and/or grids that divide the plotter into equal segments of latitude and
longitude. From the Plotter Options menu, choose either Range Rings or
Grid and press the right arrow key to turn it on. A sample screen of each
type shows below.