


Reference
34
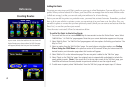
Adding Via Points
Via points are extra stops you’d like to make on your way to a final destination. You can add up to 48 via
points. When you have entered all of them, your StreetPilot can arrange them in the most efficient order
(called auto arrange) so that you can visit each point without a lot of extra driving.
Before you can add via points to a particular route, you must first activate that route. Remember, you don’t
have to be in your vehicle to activate a route; you can activate it in your home or at the office. Also, you
can add via points to a route that you have previously saved (which you can retrieve and activate from the
Route List), or one that you have just created.
Once the route is activated, follow the instructions below.
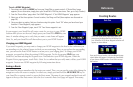
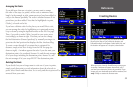
To add a Via Point to the Active Route:
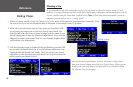
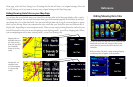
1. Press and hold the unit or remote MENU key for two seconds to view the ‘Active Route’ menu. Select
‘Add/Edit Vias.’ An ‘Edit Vias’ page appears. Note that your current destination appears on this page.
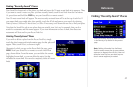
2. Select ‘Add Via Point.’ An ‘Add Via Point’ page appears with two options for finding your location: ‘Use
Map’ or ‘Find.’
3. Select an option from the ‘Add Via Point’ page. For more help on using these options, see
Finding
Places Using the FIND Menu in the previous section of this manual. When you have entered the
desired location, an information page about this location will appear.
4. Select ‘Add As Via’ on the information page. The new via point is added to the ‘Edit Vias’ page.
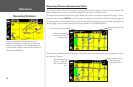
5. Select ‘Done’ on the ‘Edit Vias’ page. Your original route is automatically recalculated to include the
newly added via point. (Note: if you touch the X in the top right corner of the ‘Edit Vias’ page, your
StreetPilot will remove the newly-created via point and continue to use the original route.)
6. To add more via points, select ‘Add Another’ from the ‘Edit Vias’ page and repeat steps 3-5 above.
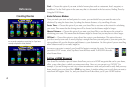
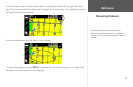
Creating Routes
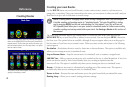
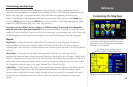
You can add a via point in order to add an extra stop
to your route. Select the Add/Edit Vias icon from the
Active Route menu shown above. An Edit Vias page
will appear (below) that lists your final destination.