Installation
38 Apollo SL30 Installation Manual
4. Verify that the remote frequencies of the airport selected via the GPS unit are displayed
on the SL30.
The interface to a DST data source (such as an Apollo GX or DB30) should be checked as
follows:
1. Operate the SL30 in NAV mode and ensure the DME is operating with a valid signal.
2. Press the SEL button to bring up the NAV frequency recall lists.
3. Turn the large knob one click to the left (counterclockwise) to show the DST display
prompt. If you do not see the Show DST Display, either the feature is disabled, or you are
not receiving the data through the serial port.
4. Press ENT to replace the current NAV display with DST data. Verify that DST data is
passed to the SL30.
To check the serial data output connections, verify the data from the SL30 can be displayed
on the other units, such as the MX series multi-function display or the Apollo GX Nav
Frequency display. For serial interface checks to a serial CDI consult the CDI installation
checkout procedures.
Comm Flight Test Check
A flight test is recommended as a final installation verification. The performance may be
verified by contacting a ground station at a range of at least 50nm while maintaining an
appropriate altitude and over all normal flight attitudes. Performance should be checked using
low, high, and mid band frequencies.
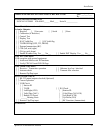
Check the VOR
1. Tune a local VOR station within 50 miles.
2. Verify the audio ident/voice quality.
3. Verify the Morse code decoder IDs the station (95% probability).
4. Fly to and from the station.
5. Verify NAV flag, TO/FR flag, and CDI are operational.
6. Record accuracy in System Log (see manual).
Check the ILS
1. Tune an ILS at the local airport.
2. Verify the audio ident/voice quality.
3. Verify the Morse code decoder IDs the station (95% probability).
4. Fly the approach.
5. Verify NAV flag, GS flag, and CDI and GSI are operational.
6. Verify BC annunciator.


