


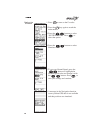

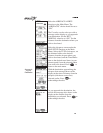
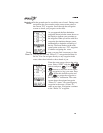


arrow symbol appears to the left of the waypoint
name.
5. Press to insert the waypoint in the
route. The waypoint is inserted and the
arrow cursor points to the second line in
the route. Repeat steps 2 through 4
above to enter additional waypoints.
When you finish inserting waypoints in
the route, select “QUIT” with the
buttons and press . The
route is ready to navigate once it is
started.
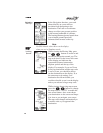
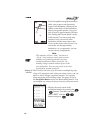
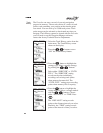
Starting
a Route
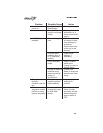
With the route you just created showing
on the screen, select “START” with the
buttons and press .
The arrow marker points to line 02,
indicating the “TO” waypoint. Waypoint
EUG on line 01 is the point of origin.
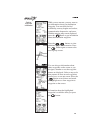
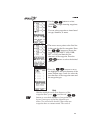
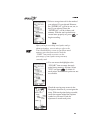
You can navigate any route you choose, but only one route
can be “Started” or active at any time. You can navigate the
route in either direction, depending on your present position.
For example, if your present position is at the last waypoint
in the route, you could use this last waypoint as the point of
origin by selecting “REVERSE.”
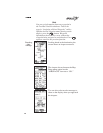
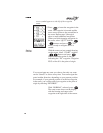
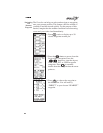
With “NORMAL” selected, press .
The route screen shows on the display
with the bearing and range to the
waypoint at the right side of the screen.