


Chapter 10 Setting Connection and Network Preferences
10.6
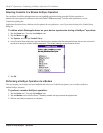
Setting Connection and Network Preferences: Network Preferences
Entering DNS Numbers and IP Addresses
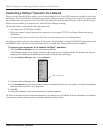
The Internet uses the Domain Naming System (DNS) to translate the names of host computers into IP addresses. A DNS number
(or IP address) identifies a specific server that handles the translation services. Each DNS or IP address is a series of four numbers,
from 0 to 255, separated by periods.
Anyone who logs onto the Internet must have a unique identifier called an IP address. This IP address can be either temporary
(assigned automatically each time you log on) or permanent.
Not all systems require that you enter a DNS number. Check with your system administrator. If a DNS number is required but not
entered, logging on to your network may appear successful; however, the connection will fail if you try to use an application or look
up information.
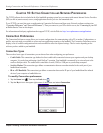
To specify a primary and secondary DNS number:
1. If your system requires DNS numbers, ask your Internet Service Provider or system administrator whether your
system requires DNS numbers, and if so, what they are.
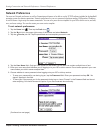
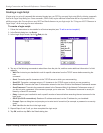
2. In the Network Preferences screen with a service template selected, tap Details.
3. Tap the
Query DNS check box to deselect it.
4. Choose one of the following options:
• If your system does not require a DNS or you are not sure whether it does, leave the DNS field blank.
• To enter the Primary DNS number, tap the space to the left of the first period in the Primary DNS field and enter
the first section of the IP address using a number only, from 0 to 255; repeat the step for the remaining sections
of the field. Use the same technique to enter the Secondary DNS number.
To specify the IP address:
1. Check with your system administrator to determine whether your IP address is automatically (temporarily), or per-
manently assigned, and if permanent, get the address.
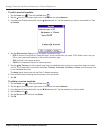
2. In the Network Preferences screen, with a service template selected, tap
Details.
3. Choose one of the following options:
• If your IP address is automatic and temporary, make sure that the IP Address check box is selected.
• If your IP address is permanently assigned, tap the IP Address check box to deselect it. In the permanent IP ad-
dress field, tap the space to the left of the first period, and enter the first section of the IP address using a num-
ber only, from 0 to 255. Repeat the step for the remaining sections of the field.
4. Tap
OK.