


94
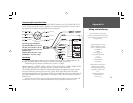
Appendix A
Unit Installation
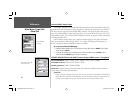
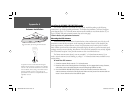
The GPSMAP 188/188C/238 Sounder can be fl ush mounted on a fl at panel. When fl ush mounting
the GPSMAP 188/188C/238 Sounder, be sure to choose an appropriately sized location for the unit and
leave 1.25” (32mm) clearance below the data card slot for inserting/removing data cards.
For fl ush mounting the GPSMAP 188C unit, refer to the instructions on the Flush Mount Template
(190-00264-00).
The GPSMAP 188/238, with external antenna, may also be fl ush mounted on a fl at panel using its
existing mounting bracket.
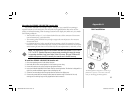
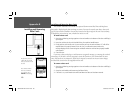
To fl ush mount the GPSMAP 188/238 unit:
1. Remove the four M5 screws from the back of the unit and remove the mounting bracket.
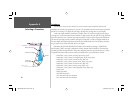
2. Using the mounting bracket as a template, outline the center relief area and mark the location of
the four screw holes centers on your bulkhead or other surface (fi gure 1).
3. Cut the relief hole from the panel and drill the four 0.20” (5.08 mm) screw holes. You may want to
cut slightly inside the indicated line and then sand or fi le the panel as needed to obtain the best fi t.
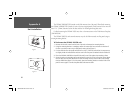
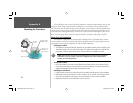
4. Place the GPSMAP 188/238 into the relief hole until it rests fl ush against the mounting surface.
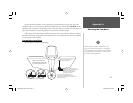
5. Secure the unit to the mounting surface using the M5 screws. Do not try to force the screws deeper
into the holes than the holes will allow. For thick mounting surfaces, insert the M5 screws directly
thru the drilled holes (fi gure 2). For thin panels, place the mounting bracket on the back side of the
panel for more support. Connect the power/data and antenna cables.
Figure 1
Figure 2
188188C238 Manual Part 2.indd 94 6/30/2003, 3:32:39 PM