35 Clean the mating faces of the thermostat
cover and cylinder head, and use a new
gasket when refitting the cover.
36 Refill the cooling system as described
earlier in this Section.
Coolant pump -
removal and refitting ¡
Note: A new coolant pump gasket must be
used on refitting. If the pump is found to be
worn it must be renewed as a complete unit as
dismantling and repair is not possible.
37 Disconnect the battery negative lead.
38 Drain the cooling system as described
earlier in this Section.
39 Remove the coolant/alternator drivebelt
as described in the next sub-Section.
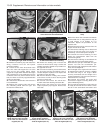
40 Unscrew the four coolant pump securing
bolts, noting that two of the bolts also secure
the alternator adjuster bracket, and withdraw
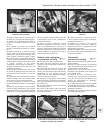
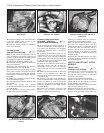
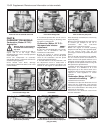
the pump from the housing (photo). Recover
the gasket.
41 Refitting is a reversal of removal, bearing
in mind the following points.
42 Use a new gasket between the pump and
the housing.
43 Refit and tension the coolant
pump/alternator drivebelt as described in the
next sub-Section.
44 On completion, refill the cooling system
as described earlier in this Section.
Coolant pump/alternator
drivebelt - checking,
renewal and tensioning ¡
45 At the intervals specified in Section 3 or
“Routine maintenance” at the beginning of
this manual (as applicable), the drivebelt
should be checked and if necessary
re-tensioned.
46 Access to the drivebelt is made from the
underside of the car on the right-hand side.
Loosen off the front right-hand roadwheel
retaining bolts, then raise and support the car
on axle stands at the front. Remove the front
roadwheel on the right-hand side.
47 Remove the underwing shield from the
right-hand wheel arch by drifting the
compression pins out from the retaining
clips. Prise free the clips and remove the
shield.
48 Additional, though somewhat restricted,
access can be obtained from above by
removing the air cleaner unit on the non-Turbo
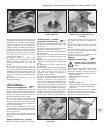
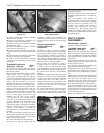
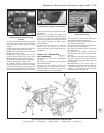
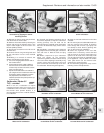
ie-engine (photo).
49 Check the full length of the drivebelt for
cracks and deterioration. It will be necessary
to turn the engine in order to check the
portions of the drivebelt in contact with the
pulleys. If a drivebelt is unserviceable, renew it
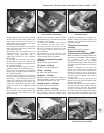
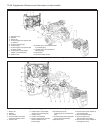
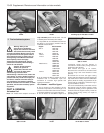
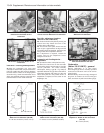
as follows (photo).
50 Loosen the alternator mounting and
adjuster nuts and bolts and pivot the
alternator towards the cylinder block.
51 Slip the drivebelt from the alternator,
coolant pump and crankshaft pulleys.
52 Fit the new drivebelt around the pulleys,
then lever the alternator away from the
cylinder block until the specified belt tension
is achieved. Lever the alternator using a
wooden or plastic lever at the pulley end to
prevent damage. It is helpful to partially
tighten the adjuster nut before tensioning the
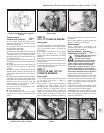
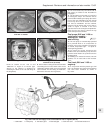
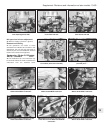
drivebelt (photo).
53 When the specified tension has been
achieved, tighten the mounting and adjuster
nuts and bolts (photo).
PART D: HEATER UNIT- LATER
MODELS
Heater unit -
removal and refitting ¡
1 The heater unit is removed complete with
the facia/control panel. Commence by
draining the cooling system as described
previously in this Section.
2 Disconnect the battery negative lead.
3 Refer to Section 15 of this Chapter for
details and remove the ashtray/cigar lighter
and the auxiliary control panel.
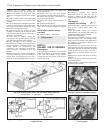
4 Undo the upper screw retaining the heater
unit to the facia (see Fig. 13.31).
5 Remove the radio from the central facia.
6 Undo the retaining screw on each side at
the front of the gear lever console. Prise free
13•58 Supplement: Revisions and information on later models
Fig. 13.31 Removing the heater unit-to-
facia upper retaining screw (Sec 8D)
8C.53 Tightening the alternator adjuster
nut
8C.52 Fitting a new coolant
pump/alternator drivebelt around the
pulleys
8C.49 Alternator/water pump drivebelt and
tensioner viewed from the right-hand
wheel arch
8C.48 Top side view of water pump,
alternator and drivebelt
8C.40 Coolant pump/alternator bracket
bolt removal


