


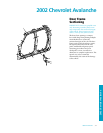
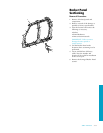

3-6 2002 Avalanche
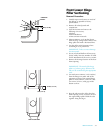
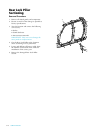
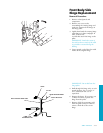
Front Lower Hinge
Pillar Sectioning
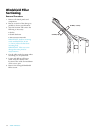
Installation Procedure
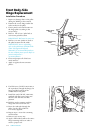
1. On the service part, measure 50␣ mm (2␣ in.)
down from the large wiring harness hole in
the hinge pillar and mark a horizontal line.
Cut the hinge pillar along this line.
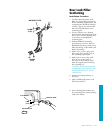
2. Perform additional sectioning procedures as
necessary to remove the unused areas of
the service part. Refer to Windshield
Sectioning; Center Pillar, Rear Lock Pillar,
and Rocker Sectioning.
NOTICE: In any area damaged beyond
recognition, space plug weld holes every
40␣ mm (1-1/2␣ in.) apart.
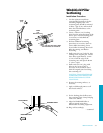
3. Drill 8␣ mm (5/16␣ in.) plug weld holes as
necessary in the locations noted from the
original section. Also drill plug weld holes
along the hinge pillar sectioning cut of the
service part. These should be located
approximately 15␣ mm (9/16␣ in.) from the
edge of the cut.
CAUTION: FOAM SEALERS ARE
FLAMMABLE AND SHOULD BE
REMOVED FROM ALL WELD
LOCATIONS.
4. Prepare mating surfaces as necessary.
5. Apply weld-thru primer to all bare-metal
surfaces.
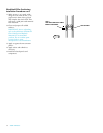
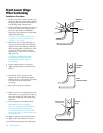
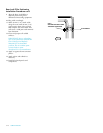
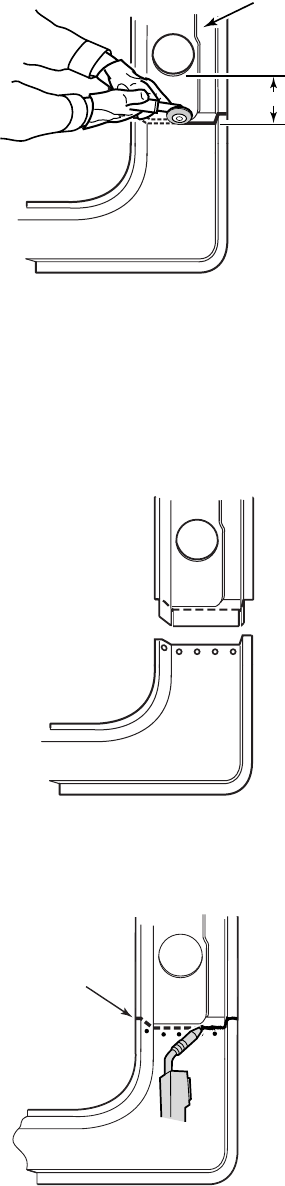
6. Position the service section over the
stepped tab on the original hinge pillar,
allowing 30␣ mm (1-3/16 inches) of overlap.
Check fit using three-dimensional
measuring.
7. Plug weld service part in position.
8. Make 25␣ mm (1␣ in.) welds along the seam
with 25␣ mm (1␣ in.) gaps between. Then go
back and complete the stitch weld. This
will create a solid joint with minimal heat
distortion.
9. Clean and prepare all welded surfaces.
IMPORTANT: Prior to refinishing,
refer to the publication GM4901M-D-01
GM Approved Refinish Materials for
recommended products. Do not combine
paint systems. Refer to paint manufacturer’s
recommendations.
10. Apply an approved anti-corrosion primer.
11. Apply sealers and refinish as necessary.
12. Install all related panels and components.
50 MM (2 IN)
SERVICE
PANEL
ORIGINAL
PANEL
NEW
SERVICE PANEL
ORIGINAL
PANEL
30 MM (1-3/16 IN)
OF OVERLAP