


41
want to delete and tap Delete Menu> Delete.
E-mail
Before you can send or receive emails, you need to set
up an email account. Your Toshiba phone supports the
following types of email accounts (all of which are
covered in this section):
• Internet email (POP3/IMAP)
• Exchange server (Outlook)
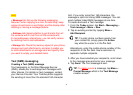
Setting up an email account automatically
1. From the Today screen, tap Start > Messaging >
New Account.
2. Tap Enter e-mail address: field to enter your email
address for this account.
3. Tap the box in the Try to get e-mail server
settings from the internet field.
4. Tap Next.
5. If the account is set up successfully, you are
prompted to send and receive email.
If the account is not set up successfully, you must
tap Next and set up the account manually, as
described in the following section.
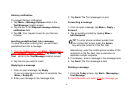
Setting up an email account manually
1. Enter a
your name (the name you want displayed
when you send email) in the Your name: field.
2. Enter Account display name in the Account
display name field and tap Next
3. Enter the name of the incoming server in the
Incoming mail: field, select the Account type
(POP3 or IMAP4) and tap Next
4. Enter a user name in the User name: field. This is
usually the first part of your email address, which
appears before the sign ‘@’ sign
5. Enter a password in the Password: field.
TIP: Choose a strong password - strengthen
the security of your password by selecting a
combination of word and number characters.
6, Tap the box in the Save password field. if you wish
to save your password to your Toshiba phone
This may or may not be required. Contact your
Internet Service Provider for more information.