43
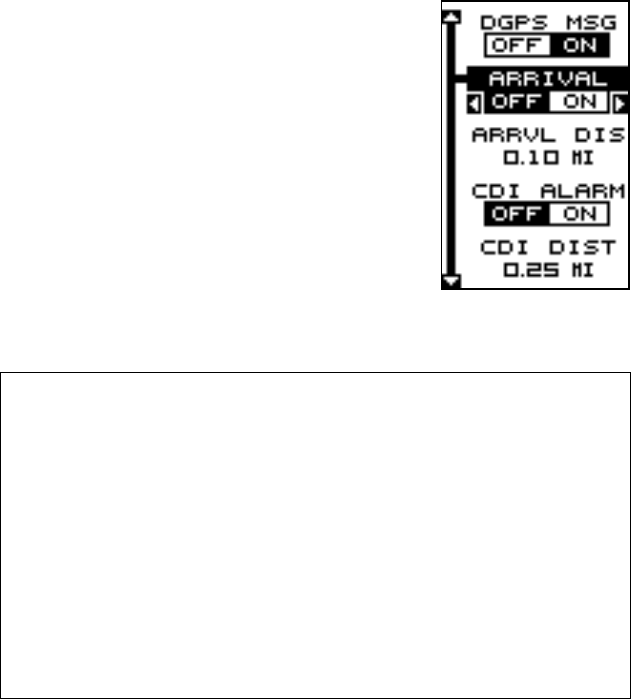
“ALARMS/CDI” menu. A screen similar to the one
shown at right appears. Press the up or down ar-
row key to move the black box to the desired alarm,
then press the right arrow key to turn it on.
To adjust an alarm’s distance, move the black box
to the alarm’s “DIST” menu item, then press the
right or left arrow keys to increase or decrease
the alarm’s distance.
When you’re finished adjusting the alarms, press
the EXIT key to erase this menu.
Important Alarm Notes:
Anchor Alarm - Since civilian users don’t receive the accuracy given to
military users, the anchor alarm may be triggered even when you’re
sitting still. This typically happens when using small (less than .05 mile)
anchor alarm ranges. If you have a DGPS beacon receiver connected
to the GlobalNav 200, smaller ranges may be usable.
Arrival Alarm - If you set the arrival alarm’s distance to a small number,
and you run a route (see the routes section), the GlobalNav 200 may
not show navigation data to the next waypoint, once you arrive at the
first one, since you may not be able to come close enough to the first
waypoint to trip the arrival alarm.
MESSAGES
The position and DGPS message selections are found on the Alarms/
CDI menu. When turned on, the position message appears for a few sec-
onds whenever the GlobalNav 200 locks onto the satellites and shows a
position. It also appears when the unit loses the lock onto the satellites
and cannot navigate. Pressing the EXIT key erases these messages.
The DGPS message appears whenever the unit begins or stops using
DGPS data to help determine your position.
The default setting for these messages is “on”. To turn either message off,
select the “Setup Alarms” menu from the main menu, then move the black
box to the desired message and press the left arrow key. Press the EXIT
key to erase this screen.
