26
“WPT 2” in waypoint 5’s name field.
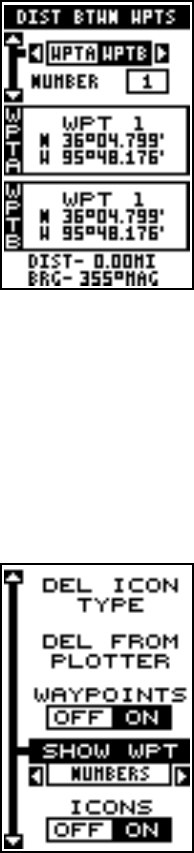
DISTANCE BETWEEN WAYPOINTS
The GlobalNav 200 can easily give you the dis-
tance between two user waypoints. To do this, first
press the WPT key, highlight the “Options” menu
and press the right arrow key, then highlight the
“Dist Btwn WPTS” label and press the right arrow
key. The screen at right appears.
The black box is resting on the “WPT B” label.
Now press the down arrow key to highlight the
waypoint number label. Press the left or right ar-
row keys until the desired waypoint appears in the “WPT B” box.
Once you have the first waypoint showing on the screen, then you need
to choose the other waypoint that you’re going to measure. Move the black
box back to the “Select” label at the top of the screen, then press the left
arrow key to select “A”. Now choose the waypoint that you wish to mea-
sure. The distance and bearing from the first waypoint “A” to the second
waypoint “B” shows at the bottom of the screen. You can select more
waypoints to measure at this time or press the EXIT key to erase this
screen.
WAYPOINT OPTIONS
You can customize the look of the waypoints on
the plotter, or even turn them off. To do this, first
press the MENU key, then highlight the “WPT/
Icon Opts” label. Press the right arrow key. The
screen shown at right appears.
To keep the waypoints from showing on the plot-
ter, simply press the right arrow key when the
“Waypoints” label is highlighted.
To change the method waypoints show on the plot-
ter, highlight the “SHOW WPT” label. The default
is numbers. In other words, when the waypoint shows on the plotter, it’s
number appears in a box, showing both its identity and location. You can
change this from number to name, or simply an empty box (position) show-
ing no identifiable name or number by pressing the left or right arrow keys
until the desired method appears. Now press the EXIT key. This erases
the menu and returns to the plotter with your selection.


