18
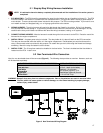
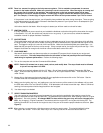
1. BLACK WIRE - Connect the black wire to a solid chassis ground with the ring terminal provided. The best place to
connect is the negative side of the battery.
2. RED WIRE - Connect the red wire directly to the positive side of the battery with a ring terminal provided.
3. RED/WHITE WIRE - Connect the red wire with the white stripe to a 12 volt source which only has power when the ignition
switch is on. Make sure it has power when the key is in the “start” position also.
4. LIGHT BLUE WIRE - The light blue wire is optional. It is rarely needed. It is triggered by a ground from the neutral safety
switch. It allows for the IAC to a programmable value when the vehicle is put into gear to prevent stalling. Again, it is
rare that it is needed. 99.8% of stalling problems when a vehicle is placed into gear is from improper tuning. This wire
needs to be GROUNDED when the vehicle is in park or neutral.
5. ORANGE/RED WIRE - The orange wire with red stripe is used to raise the idle speed a programmable amount when the
air conditioning is turned on. Depending on the engine and desired idle speeds, it is unlikely that it is needed. This wire
needs a +12 volt input to raise the idle speed. This wire would be connected directly to the AC compressor.
6. GREEN/BLACK WIRE - The green wire with black stripe is used to activate the fuel pump. It is advised to use a
separate relay to power the pump and use the green/black wire to energize the relay. This is required with pumps that
draw current over 10 amps. See Appendix 9 for important information on fuel pumps. Connect ground side of pump to
good chassis ground.
5.3 Plug-In Connections
NOTE: See Appendix 10 for diagrams.
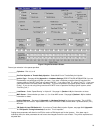
1. Air Charge Temperature Sensor – Find the 2 wire connector with the BLUE and BLACK/WHITE wires. Plug this into the
air temperature sensor, which is located in the intake manifold.
2. Coolant Temperature Sensor - Find the 2 wire connector with the BROWN and BLACK/WHITE wires. Plug this into the
coolant temperature sensor, which is located in a coolant passage.
3. Throttle Position Sensor (TPS) - Find the 3 wire connector with the BLACK/WHITE, GREEN, and ORANGE wires.
Plug this into the TPS located on the throttle body.
4. Idle Air Control (IAC) Motor – Find the 4 wire connector with the PURPLE wires. Plug this into the IAC Motor, which is
located on the throttle body.
5. Oxygen Sensor (O
2
) – Plug this into the oxygen sensor which is located in the exhaust system. It is the 3 wire connector
with a RED, PURPLE, and BLACK wire. Route the wire away from heat to avoid damage to the sensor or wire.
6. Manifold Absolute Pressure (MAP) Sensor – Locate the 3 wire flat connector with the following color wires:
BLACK/WHITE, ORANGE, AND RED/BLACK. Plug this connector into the MAP sensor. Two and Three bar MAP
sensors are optional in some kits. The base kits come with a one bar MAP sensor. If a two or three bar MAP sensor is
used, it must be selected in the “Engine” parameters when you get the computer hooked up. The two and three bar MAP
sensors should include a connector that may have to be changed on the harness.
7. Injector Harness - The harness for the fuel injectors is separate from the main harness. For multi-port systems, route
the injector harness as desired. This harness plugs into the 5 wire connector on the main harness. TBI systems also
plug directly into this connector.
5.4 Ignition Wiring
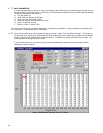
Appendix 10 includes wiring diagrams to wire the following:
Large Cap Computer Controlled GM HEI – Plugs directly into the 4 pin weatherpack ignition connector in the Commander
950 harness.
Small Cap Computer Controlled GM HEI – Requires adapter (PN 534-138) that plugs into the 4 pin weatherpack connector
in the Commander 950 harness. This adapter is included with complete Chevrolet SB and BB Multi-port EFI systems.
Ford TFI – Works with any Ford TFI electronic distributor. Requires adapter (PN 534-139) that plugs into the 4 pin
weatherpack connector in the Commander 950 harness. This adapter is included with complete Ford Multi-port EFI systems.
Large Cap Non-Computerized HEI – This distributor uses mechanical and vacuum advance and is not capable of having the
Commander 950 control timing.


