


2 Tie-rod end balljoint -
renewal
4
1 Jack up the front of the car and remove the
roadwheel from the side on which the balljoint
is to be renewed.
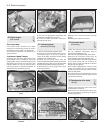
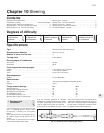
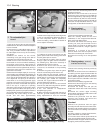
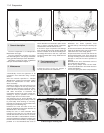
2 Unscrew the tie-rod balljoint taper pin nut
and, using a suitable extractor, separate the
tie-rod balljoint from the eye of the steering
arm (photo).
3 Release the locknut on the tie-rod,
unscrewing it only just enough to be able to
unscrew the tie-rod end from the tie-rod.
4 With the tie-rod end removed, wire brush
the threads on the tie-rod without disturbing
the position of the locknut; apply grease to
the threads and screw on the new tie-rod end
until the locknut can be tightened by turning it
through the same amount of rotation it was
given when unscrewed.
5 Reconnect the balljoint taper pin to the eye
of the steering arm and tighten the retaining nut
to the specified torque. Never grease the taper
pin or eye; the pin will otherwise turn when the
nut is tightened. If a taper pin is inclined to
rotate when a nut is being tightened, apply
pressure to the socket of the joint to force the
taper pin into closer contact with the tapered
hole in the eye. If a taper pin is pointing
downward, a strong lever can be used to apply
the extra pressure. Where the taper pin of a
balljoint points upward, a jack placed under the
joint socket will produce the desired result.
6 Although the careful fitting of the new
tie-rod end will have approximately
maintained the original front wheel alignment
of the car, manufacturing differences alone of
the new component make it essential to
check the setting, as described in Section 8
and to adjust if necessary.
3 Steering rack gaiter -
renewal
4
1 If lubricant is found to be leaking from the
gaiters (at the ends of the housing), first check
that the gaiter clips are secure.
2 If the lubricant is leaking from the gaiter
through a split, the gaiter can be removed in
the following way, without the necessity of
withdrawing the gear from the car.
3 Remove the tie-rod end from the side
concerned, as described in the preceding
Section.
4 Release the gaiter clips; draw the gaiter
from the rack housing and off the tie-rod.
5 If the gaiter has only just split, road dirt is
unlikely to have entered and lubricant can be
wiped away. If it is severely grit contaminated,
the steering gear should be completely
removed, the original lubricant flushed out
and new lubricant pumped in.
6 If the gear does not have to be removed
from the car, slide the new gaiter into position
and secure it with the inboard clip.
7 The rack lubricant is molybdenum
disulphide type grease.
8 When recharging the gaiter with this type of
lubricant, give full steering lock to the side
being replenished so that the extended
section of the rack will take the grease into the
housing as it returns.
9 Reconnect the tie-rod end to the tie-rod
and the eye of the steering arm. Provided the
locknut is tightened by only rotating it through
the same distance by which it was loosened,
the front wheel alignment (tracking) should not
have been unduly disturbed. Even so, check
the alignment as described in Section 8.
4 Steering wheel -
removal and refitting
1
1 Disconnect the battery negative lead.
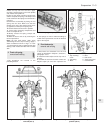
2 Set the steering wheel and the front
roadwheels in the straight-ahead attitude.
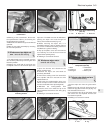
Prise out the hub plate (photo).
3 Unscrew and remove the steering wheel
securing nut, then pull the wheel from the
column shaft. If it is tight on its splines, tap it
upward at the wheel rim, using the palms of
the hands.
4 Refitting is a reversal of the removal
process; make sure that the spokes of the
wheel are in the lower part of the wheel.
5 Tighten the securing nut to the specified
torque.
5 Steering column - removal,
overhaul and refitting
3
1 Remove the steering wheel as previously
described.
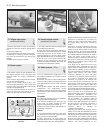
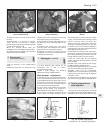
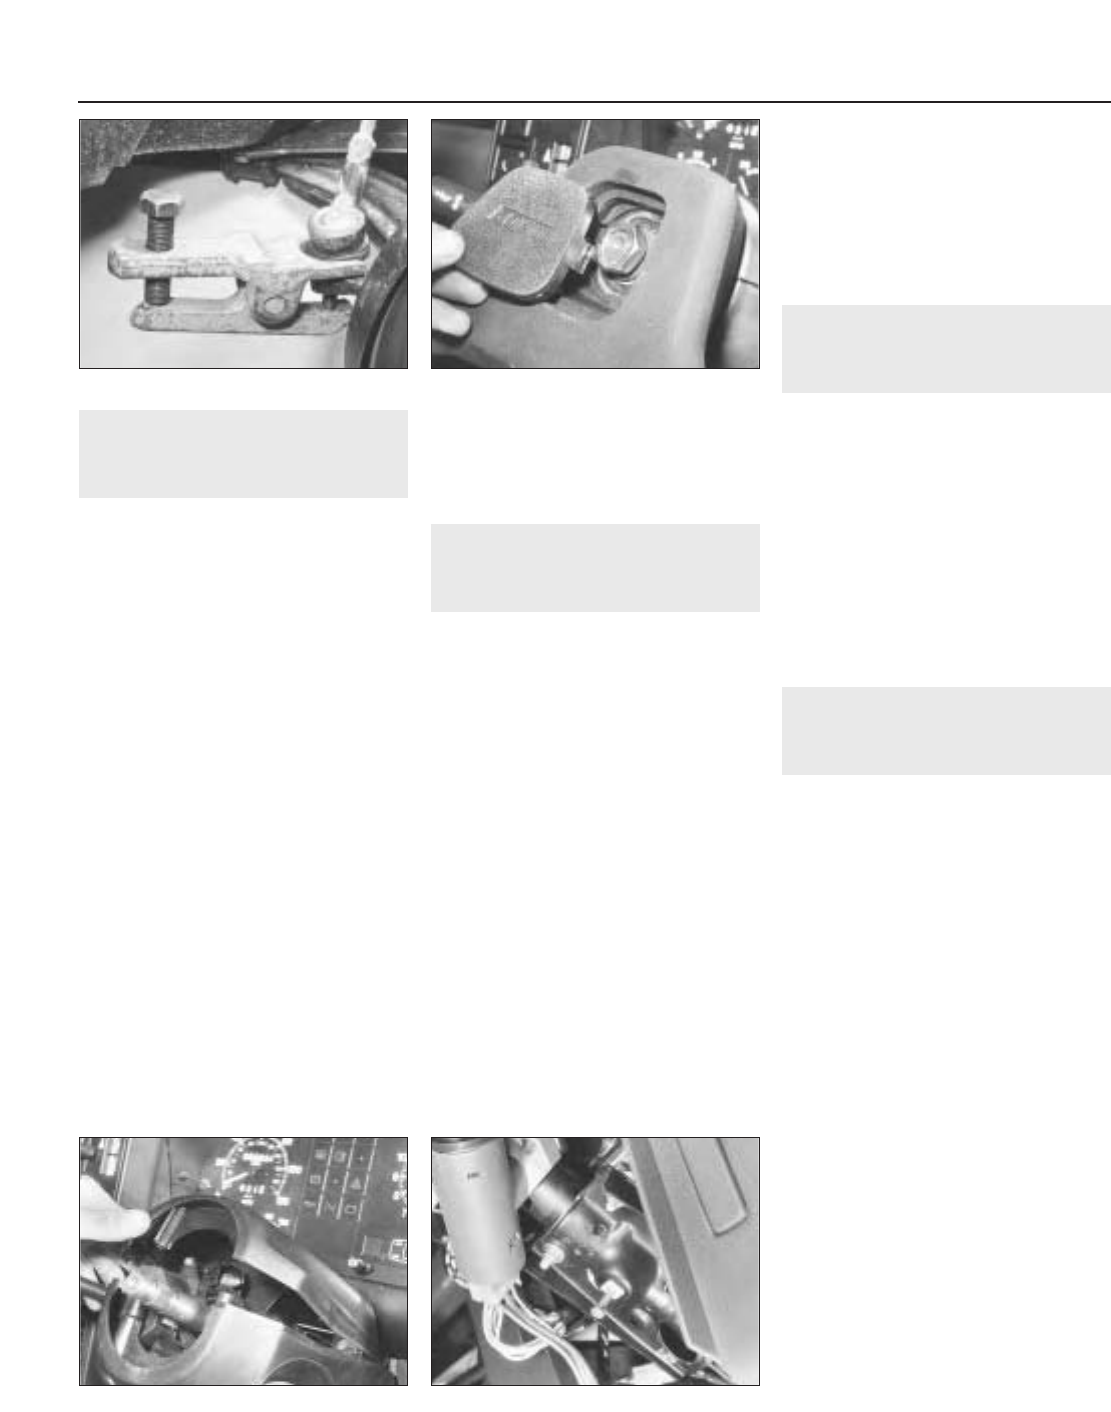
2 Extract the screws from the underside of
the steering column upper shroud and then lift
off the upper and lower shroud sections
(photo). Where applicable, detach and remove
the trim panel from the underside of the facia
on the driver’s side.
3 Disconnect the battery negative lead.
4 Disconnect the wiring plug for the steering
column combination switch.
5 Unscrew the clamp nuts and pull the
combination switch off the end of the steering
shaft.
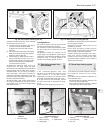
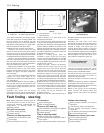
6 Unscrew the column upper mounting
bracket bolts and lower the shaft/column tube
to rest on the seat (photo).
7 Remove the pinch-bolt from the lower
universal joint coupling and remove the
shaft/column tube from the car.
Overhaul
8 Remove the pinch-bolt from the upper
universal joint and disconnect the lower shaft.
9 Grip the tube mounting flange in the jaws of
a vice and relieve the staking at the base of
the tube.
10 Using a plastic or copper-faced hammer,
tap the shaft down out of the tube.
11 The lower bush will be ejected while the
upper one should be prised out of the tube.
12 Reassemble the upper shaft into the tube
by tapping new bushes into position.
10•2 Steering
5.6 Steering column upper mounting5.2 Removing steering column shrouds
4.2 Removing steering wheel hub plate2.2 Disconnecting a tie-rod end balljoint