


29
CAUTION:
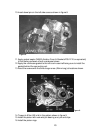
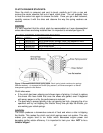
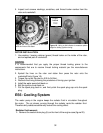
It is also important that all three shoes are stacked the same. (See figure 15)
2. Clean the threads of the stack bolt and the clutch with contact cleaner
removing all old thread locking material.
3. Apply high strength (red) thread lock material to the stack bolt and tighten as
tight as possible without stripping the Allen head.
CAUTION:
Avoid allowing excess thread lock material to contact the spring washers and the
clutch or the clutch is likely to malfunction.
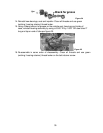
4. Use fine emery paper on the center hole of the clutch and on the tapered
section of the crankshaft.
5. Apply a small amount of wicking / bearing retainer (green) thread lock agent
to the center tapered section of the crankshaft and taper of clutch arbor.
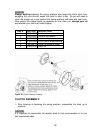
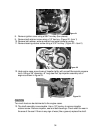
6. Put the clutch back in.
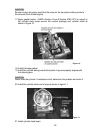
7. Apply high strength (red) thread locking agent to the threads and install the
nut and torque to 40 ft-lb (54Nm) with the special socket (see figure 16).
CAUTION:
Use high strength (red) thread locker on the threads of the clutch nut. If you are
using an impact socket, just zap it lightly with an air wrench to tighten it because
there are only about 4 threads inside the nut and they can be easily stripped. If
you are tightening it by hand, you can very carefully use a 3/4" piece of wooden
dowel rod inside the exhaust port to block the piston so you can tighten the nut.
Do not use something harder than your aluminum piston and do not crush the top
of the piston into the ring.
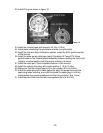
INSPECTION NOTE:
a. There must be in / out play in installed clutch (1.5 mm maximum).
b. Excess in/out will cause early crank seal failure.
c. A blue clutch drum is worn out from excessive slippage or improper
lubrication.
d. Should be no looseness in clutch shoes.