


23
VRX878RVD
English
Owner’s manual
Basic Operations
Note:
• Be sure to read this chapter referring to the chapter
“2. CONTROLS” (page 5).
CAUTION
CAUTION
When the unit is turned on, starting and
stopping the engine with its volume raised to
the maximum level may harm your hearings.
Be careful about adjusting the volume.
Turning on and off the power
Note:
• Start the engine before using this unit.
• Be careful about using this unit for a long time
without running the engine. If you drain the car’s
battery too far, you may not be able to start the
engine and this can reduce the service life of the
battery.
1. Start the engine. The illuminations on this unit
light up.
2. Press the [SRC] button. When the liquid
crystal panel is not open, press the [P]
(OPEN) button to turn on the power. The unit
automatically memorizes its last operation
mode and will automatically switch to display
that mode.
3. To turn off the power, press and hold the
[SRC] button for more than 1 second.
* When AUTO PANEL is set to ON or CLOSE,
the liquid crystal panel houses after the power
turns off.
Selecting a mode
When the liquid crystal panel is
open
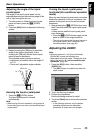
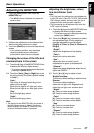
1. Press the [SRC] button to display the Source
menu.
* External equipment not connected to this unit
is not displayed.
2. Touch the desired mode key.
When the liquid crystal panel is
closed
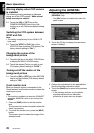
1. Press the [SRC] button to change the
operation mode.
Each time you press the [SRC] button, the
operation mode changes in the following
order:
TUNER mode ➜ (DAB mode) ➜ DVD
PLAYER mode ➜ (CD CHANGER mode) ➜
(DVD CHANGER mode) ➜ (TV/VTR mode)
➜ VISUAL mode ➜ (iPod mode) ➜ TUNER
mode...
* External equipment not connected to this unit
will not be selected.
* When 2-ZONE function is ON, the [SRC]
button operates only for the MAIN zone. To
switch to a SUB zone source, specify from the
Source menu screen, or use the remote control
unit.
●About the CT (Clock Time) display
• The displayed clock data is based on the CT
(clock time) data in the RDS signal, or the GPS
data when the Navigation system is connected.
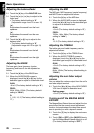
Adjusting the volume
1. Press the [E]/[e] buttons to adjust the
volume.
[E]: Increases the volume.
[e]: Decreases the volume.
• The volume level indicated in the display is
in a range from 0 (min.) to 33 (max.).
CAUTION
CAUTION
While driving, keep the volume level at which
external sounds can be heard.
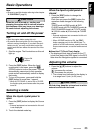
Engine ON
position