


19
How to Dene a New Map Area (Using “Fence Posts”):
• Click the HOT button to get the HOT menu, then press “+” to switch to the
“My Stuff” menu.
• Highlight “My Map Areas” and press OK-you will see “Create New Map Area”,
already selected. Press OK.
• A default name for the new Map Area is assigned (MPA001), and you’ll see 3
options: Add Fence Post, Edit Name, and Delete. You can edit the name of the
Map Area now, or change it later. Select “Add Fence Post” and press OK. e
default name for your first Fence Post is “FP001”, this can be changed later if
you like.
• Use the 4-way keypad to move the Fence Post if you need to ne tune its
location (zoom in first with the “+” key if necessary.
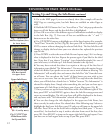
• Once you have the rst Fence Post where you want it, press OK to conrm and
set it. Its name will then be displayed under the Map Area heading (MPA001).
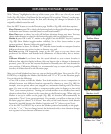
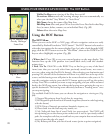
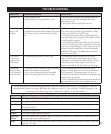
Press OK or the RIGHT key to see these options
(Fig. 30)
:
Insert After-press OK to place the next Fence Post where the first is (you can
then move it elsewhere with the 4-way keypad), or press the RIGHT key to
see options for placing the next Fence Post based on a waypoint, POI, your
current location, etc.
Move-change the position of this Fence Post
Edit Name-change the name for this Fence Post
Set as Post #1-after selecting a previously placed Fence Post, select this
option and press OK to use the same Fence Post as the starting point of a new
(adjacent) Map Area.
Delete-erase the Fence Post
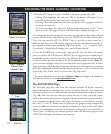
• Keep using “Insert After” to add Fence Posts until you have placed at least three
or four to define the boundaries of the Map Area you are creating. Press EXIT or
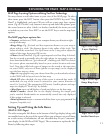
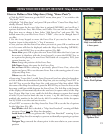
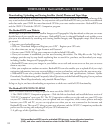
the LEFT key to see the Map Areas List, with your new Map Area added. With
the name of the Map Area selected, press the RIGHT key to view the Area on the
base map, with lines visible between the Fence Posts. e Info Box at the bottom
of the display will automatically show the total area (in square miles) of the Map
Area. If your Map Area is very small, the Info Box changes to square feet instead
of miles. If you need to know the area in acres, 1 sq. mi.=640 acres, so simply
multiply the number in the info box by 640. For small areas, divide the square
feet by 43560 to see the total area in acres.
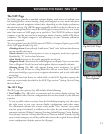
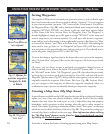
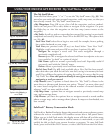
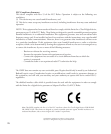
• Press EXIT to return to the Map Areas list. Press OK to see the list of options
for the Map Area
(Fig. 31)
:
Stay Within-when this is checked, a “Map Area Breached!” warning will flash
onscreen if you leave the Map Area boundary.
Avoid Area-check this to generate the “Map Area Breached!” warning if you
enter the Map Area (for example, to prevent accidentally trespassing on private
property).
Navigate To-go towards the closest point in the area relative to your current
position
USING YOUR ONIX350 GPS RECEIVER : Map Areas/Fence Posts
Fig 29. Completed
Map Area-built with
4 fence posts
Sq. Miles
Fig 31. Map Area
Options List
Fig 30. Map Area
Fence Post Options