


18
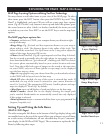
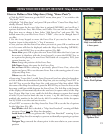
Setting Waypoints
e simplest GPS function is to mark your present location, so you can find it again
later. Any location that you choose to mark is called a “waypoint”. To set a waypoint
at your current position, just press “OK” (center of the 5-way button). You will see
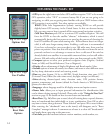
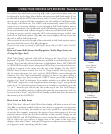
the Waypoint Menu (Fig. 26), with a numbered default name assigned to the new
waypoint (WPT000, WPT001, etc) shown at the top, with these options below
it: Edit Name, Edit Icon, Activate Alert, Set Waypoint. Since “Set Waypoint” is
already highlighted, simply press OK again to accept “WPT###” as the name and
create a waypoint at your current position. Or, scroll up to edit the new waypoint’s
name and/or icon before setting it-this might make it easier to nd later (see “How
to Create/Edit Names..” and “How to Set/Edit Icons” for details). After editing the
name and/or icon, go down to “Set Waypoint” and press OK-you’ll then see the
new waypoint on the map with the name and icon you gave it. If you decide not to
set the waypoint, simply press EXIT or the LEFT key.
To set an alert beep to signal anytime in the future when you return to the waypoint,
select “Activate Alert” and press OK to set the alert (repeat to De-Activate previously
set Alerts).
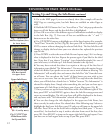
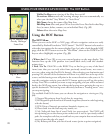
Of course, you can always rename a previously set waypoint, change its icon, or
delete it entirely at any time in the future. Press the HOT button, then “+” to view
the “My Stuff” menu. Select “My Waypoints”, press OK, then select the previously
set waypoint you want to work with from the list. Press OK, and you will see the
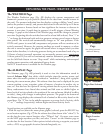
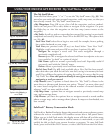
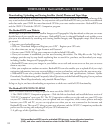
Waypoint Options menu (Fig. 27). Along with the same options you saw when you
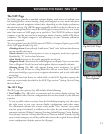
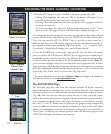
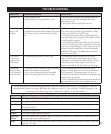
originally created the waypoint (Edit Name, Edit Icon (Fig. 28), Activate Alert),
you can navigate to the waypoint, or delete the waypoint completely (there is a
confirmation step to prevent accidentally deleting an important waypoint).
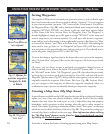
Creating a Map Area (My Map Areas)
A special feature available on the MAP page lets the user define a polygonal (triangle,
square, etc) area of any size, placed anywhere, which can then be used to simply
measure that area (show the total sq.mi. or sq.ft.), help define map and property
boundaries, and/or generate an alert message when the area is either entered or
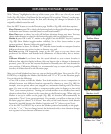
exited. is is done by placing a minimum of three virtual “fence posts” on the map
which are used to define the limits of the area (Fig. 29). e process for setting up a
custom Map Area is outlined on the next page. More information about utilizing
the “My Map Areas” features can be found at: http://www.bushnell.com/gps/
by clicking the Product Support link.
Let’s take a look at the basics of setting up and using your Map Areas...
USING YOUR ONIX350 GPS RECEIVER : Setting Waypoints / Map Areas
Fig 26.
Waypoint
Menu-Press OK to set
new waypoint
Fig 27.
Options for
previous waypoints:
Navigate To, Edit
or Delete
Fig 28.
Waypoint
“Edit Icon”