12
EXPLORING THE PAGES : MAP & Info Boxes
1. Go to the MAP page if you are not already there (this example will use the
MAP Page as a starting point, but Info Boxes are available on other Pages as
well).
2. Hold the MENU button for 2 sec. You will see a “Nav” tab pop up above the
lower set of Info Boxes, and the first Info Box is highlighted.
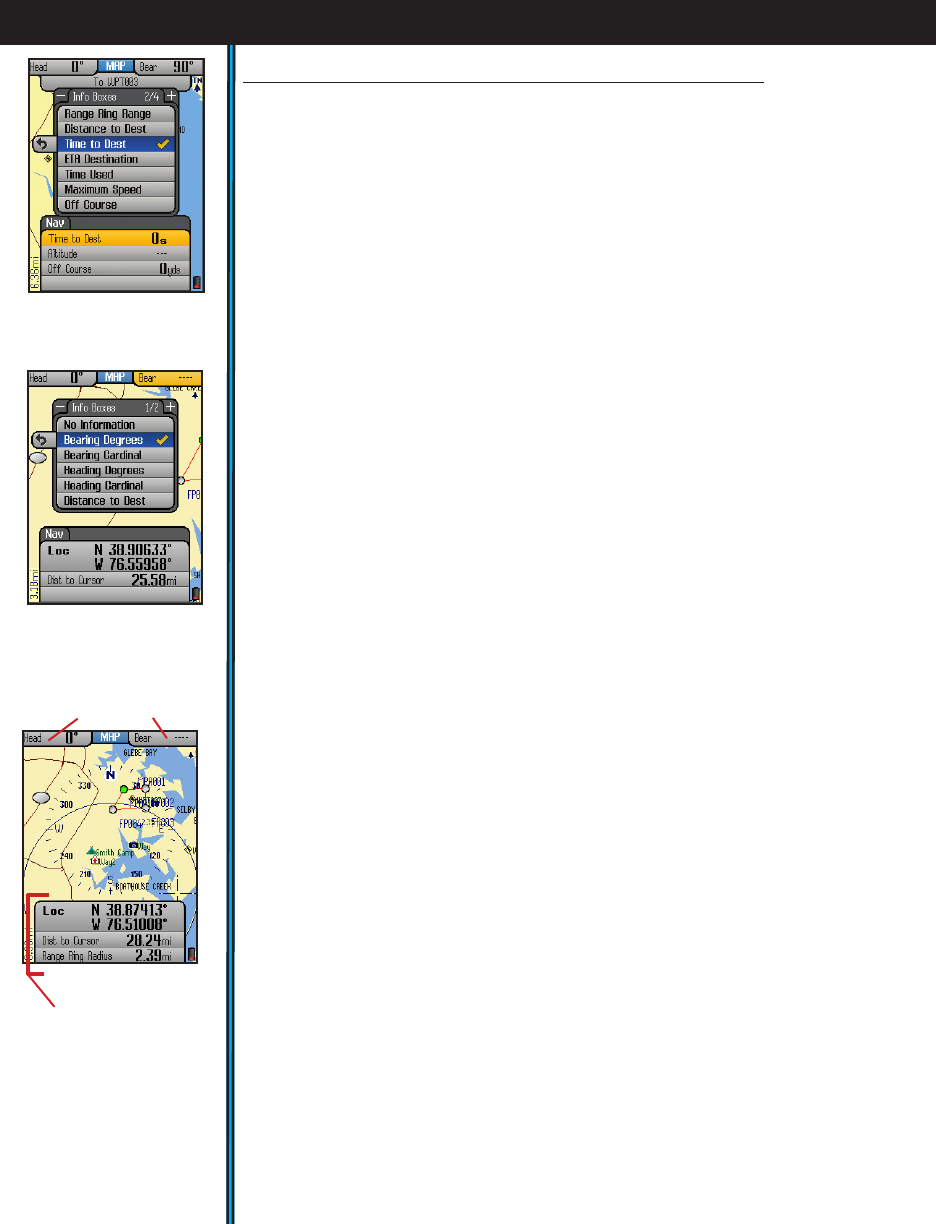
3. Press OK to see a list of the different types of information available to display
in the Info Box (Fig. 7). Four sets of lists are available-use the “+” and “-“
buttons to see the other lists.
4. Use UP/DOWN buttons to highlight one of the listed options (for example,
“Local Time” from the 3rd list) (Fig. 8), then press OK to checkmark it (press
EXIT to return without changing the selected Info Box). e first Info Box will
change to display the local time-your new selection has replaced the previous
type of info.
5. Press DOWN to select the second Info Box and repeat steps 3 & 4 to change
what is displayed in this box. Repeat the process again if you like for the third
box. Note that if you choose “Location” (your latitude/longitude) for one of
your info boxes, it will take up 2 Info Boxes (latitude is the top box).
6. You may have noticed that there is an option at the top of the first list of
information types labeled “No Information”. You may select this option for any
of the Info Boxes if you prefer not to use one or more of them-as selecting “No
Information” will actually clear and remove that Info Box “slot” from the lower
set of boxes. You can reduce the “stack” of three boxes you start with to just
two, one or even zero. You can also press DOWN to step below the third box,
where you will find that a fourth box is “hidden” because “No Information” is
selected for display there. Simply select something else, and you can have up to
a maximum of 4 Info Boxes in the lower part of your Map screen (Fig. 9).
7. Once you have set up the lower Info Boxes with a few different types of Nav
data, press EXIT or hold MENU again to leave the Info Box setup process and
return to normal display. e info you chose will still be displayed in the boxes,
and any boxes with “No Information” selected will not appear.
8. You can also change the info displayed in the upper two Info Boxes, but
these can only be used to show Nav related data. After following step 2 above to
highlight the first lower Info Box, press UP and you will jump to the upper left
Info Box. Press OK to see the list of info to display here (then press “+” to see a
second list). As described in step 4, make a selection from one of the lists, then
press OK. Press RIGHT to jump to the upper right Info Box and repeat. Once
you have one or both upper boxes set up as you like, press EXIT.
Setting Up and Using the Info Boxes-continued
Fig 7.
Info Boxes
Info Box Options (Nav)
for lower boxes
Fig 8.
MAP Page
Info Box Options
for upper boxes
Fig 9. MAP Page
4 Info Boxes After
Set Up and Exit
Upper Info Boxes
Lower Info Boxes
(0 ~ 4, set by user)


