


128-8605
15 of 20
15
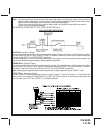
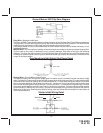
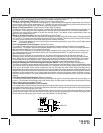
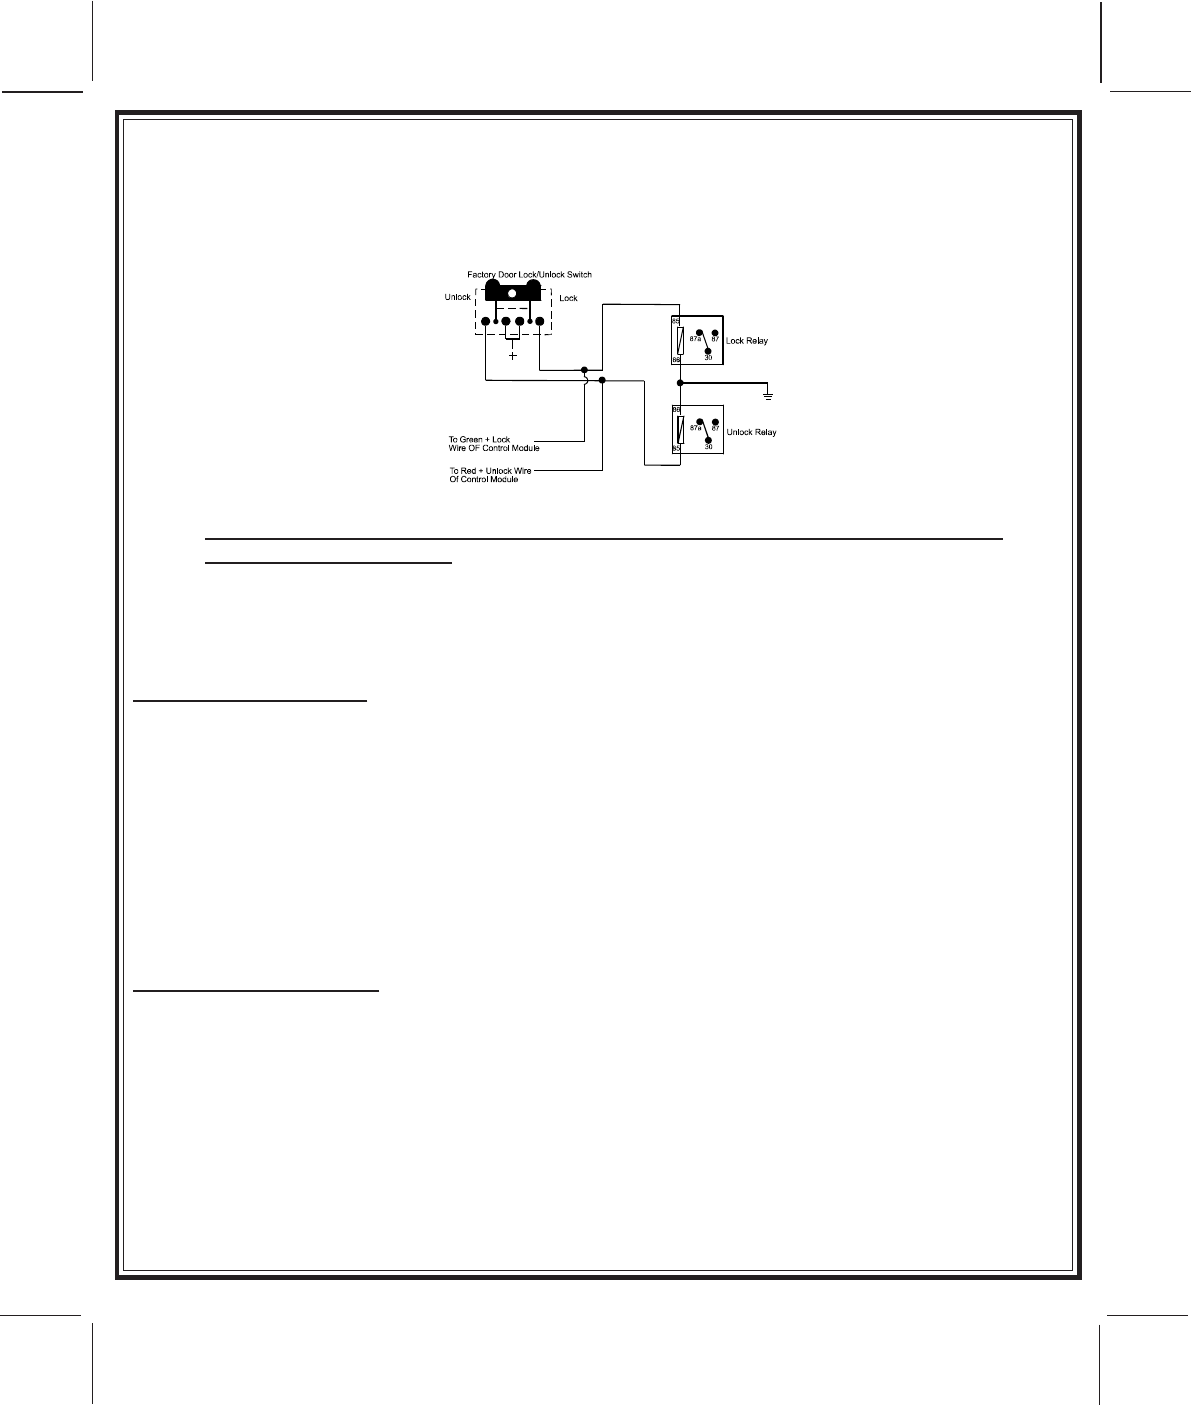
3 Wire Positive Switched Door Locks:
In this application, the Red wire of the door lock harness provides a + 12 volt pulse during the disarming sequence,
or pulsed 12 volt unlock output. Connect the Red wire to the low current 12 volt signal wire from the factory door
unlock switch to the factory door unlock relay.
The Green wire of the door lock harness provides a + 12 volt pulse during the arming sequence, or pulsed 12 volt
lock output. Connect the Green wire to the low current 12 volt signal wire from the factory door lock switch to the
factory door lock relay. See Below For Wiring Detail.
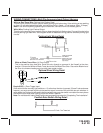
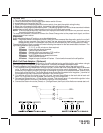
Note: Resistive Circuits, As Well As 4 Wire Polarity Reversal and 5 Wire Alternating 12 Volt
Door Lock Control Circuits
These applications require the use of additional components which may include relays, fixed resistors, or for
convenience, the DLRK Door Lock Interface. Refer to the AUDIOVOX Door Lock Wiring Supplement and or
the Audiovox fax back service for information on your particular vehicle for properly connecting to these types
of circuits.
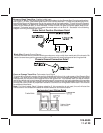
TIMED START PROGRAM:
The Remote Start unit has the ability to start the vehicle automatically at timed intervals. This feature is useful
in extremely cold climates where starting the engine is the only means to keep the battery charged and fluids
warm. The operator has the option to have the unit start every 2 or 4 hours for a maximum of 48 hours. Factory
preset is to start at 4 hour intervals. To select 2 or 4 hour automatic start timer:
1. Start By Holding the Push Button Switch On.
2. While Holding the Push Button Switch Turn The Ignition Switch On Then Off
3a) Within 10 seconds of turning the ignition switch off, Release and then Push On and release the Push
Button Switch 2 times holding it on the second time until the siren and or lights flash and chirp 2 times
indicating that the 2 Hour Start Interval has successfully been set. or
3b) Within 10 seconds of turning the ignition switch off, (Step 2) Release and then Push On and release
the Push Button Switch 4 times holding it on the fourth time until the siren and or lights flash and chirp 4
times indicating that the 4 Hour Start Interval has successfully been set.
Note: Once selected, 2 or 4, this timer interval will remain in memory until it is manually changed. To
change, the above sequence will have to be followed.
TIMED START OPERATION:
To begin the start timer, within 10 seconds of turning off the ignition switch, activate the RF command to start
2 times. (Press the start button four times). The lights will flash and the siren will chirp 4 times. Indicating
timed interval mode has been initiated. The vehicle will automatically start every 2 or 4 hours as programmed.
To cancel the timed start mode start the vehicle either by RF or by the ignition key.
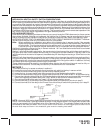
Programming Tach Rate:
Note: All applications require that tach be programmed.
The unit will not operate unless tach is programmed. If an attempt is made to start the vehicle via the remote
start without first programming tach, the unit will flash the parking lights 7 times indicating tach has not been
learned and stored. If the tach rate is not properly programmed to the specific vehicle, the unit may not realize
that the vehicle is running in certain instances reengage the starter motor.
The Remote Start Unit will learn the tach rate of most vehicle's single coil, multiple coil packs, or single
injector.