


3
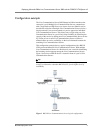
Configuring the BIG-IP and Live Communications
Server for deployment
To configure the BIG-IP and Live Communications Server for integration,
you need to complete the following procedures:
• Connecting to the BIG-IP device
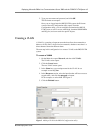
• Creating a VLAN
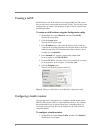
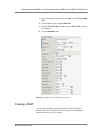
• Creating a self IP
• Configuring a health monitor
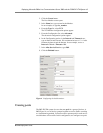
• Creating pools
• Creating a profile
• Creating virtual servers
• Creating a SNAT
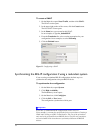
• Synchronizing the BIG-IP configuration if using a redundant system
Tip
We recommend you save your existing BIG-IP configuration before you
begin the procedures in this Deployment Guide. To save your BIG-IP
configuration, see Appendix A: Backing up and restoring the BIG-IP
system configuration, on page 30.
The BIG-IP LTM system offers both Web-based and command line
configuration tools, so that users can work in the environment that they are
most comfortable with. This Deployment Guide contains procedures to
configure the BIG-IP LTM system using the BIG-IP Configuration utility
only. Unless you are familiar with using the bigpipe command line
interface, we recommend using the Configuration utility.
Connecting to the BIG-IP device
The first step in this configuration is to connect to the BIG-IP LTM system.
You can connect to the BIG-IP LTM system using the Configuration utility.
You can also connect to the BIG-IP LTM system using the command line,
however this Deployment Guide only contains configuration procedures
from the Configuration utility.
Use the following procedure to access the BIG-IP web-based Configuration
utility using a Web browser.
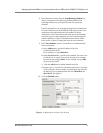
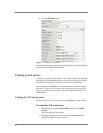
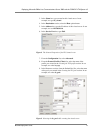
To connect to the BIG-IP LTM system using the
Configuration utility
1. In a browser, type the following URL:
https://<administrative IP address of the BIG-IP device>
A Security Alert dialog box appears, click Yes.
The authorization dialog box appears.