


5 APRS SOFTWARE FOR YOUR PC
TH-D72A/E CONTENTS 39
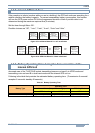
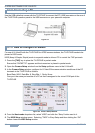
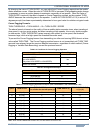
Figure 5-4 KISS Setup Window
6. Click the “OK” button in the Comms Setup window to close the Comms Setup window.
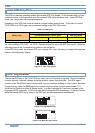
UI-View32 sends a command to TH-D72A/E’s built-in TNC that is changed to the KISS mode.
During the process, “STA” and “CON” on the TH-D72A/E’s display blink simultaneously 6 times.
Starting from this point, APRS communications starts followed by the configuration for UI-View32.
The configurations associated with APRS for TH-D72A/E (in Menu 300 to 3Y0) has no influence
to this operation.
For details of other configurations for UI-Vew32, refer to the descriptions in the help file and other
reference materials.
Note:
Even if you select “TH-D7” or “TM-D700” for TNC type in the Comms Setup window of UI-Vew32, you cannot expect proper
operation due to incompatibility of PC commands. Ensure that the transceiver is placed in KISS mode as described above.
The built-in TNC has 2 kB memory to store data for KISS mode for TX and RX.
We do not recommend you select “D700” for Easy Setup in the KISS Setup window of UI-View23 due to the incompatibility of
PC commands. As explained above, select “TNC2” for TH-D72A/E.
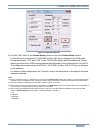
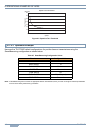
When changing the PACKET transfer rate of the built-in TNC from 1200 bps (default) to 9600 bps, modify the Into KISS
section of Comms Setup window as follows: (Add the “HB 9600” command.)
1: ^M
2: HB 9600
3: KISS ON
4: RESTART