


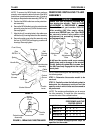
2121
5. Perform one (1) of the following:
A. LYNX SX - 3, LYNX SX - 3P, LYNX LX - 3
and PANTHER LX - 4 :
1. Proceed to STEP 5.
B. PANTHER LX - 4:
1. Reinstall the front head light assembly.
Refer to
REMOVING/INSTALLING THE
FRONT HEAD LIGHT ASSEMBLY in
PROCEDURE 10 of this manual.
S
H
R
O
U
D
/
F
O
R
K
/
W
H
E
E
L
S
/
T
I
E
R
O
D
S
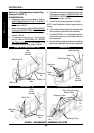
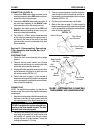
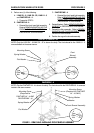
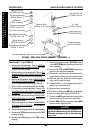
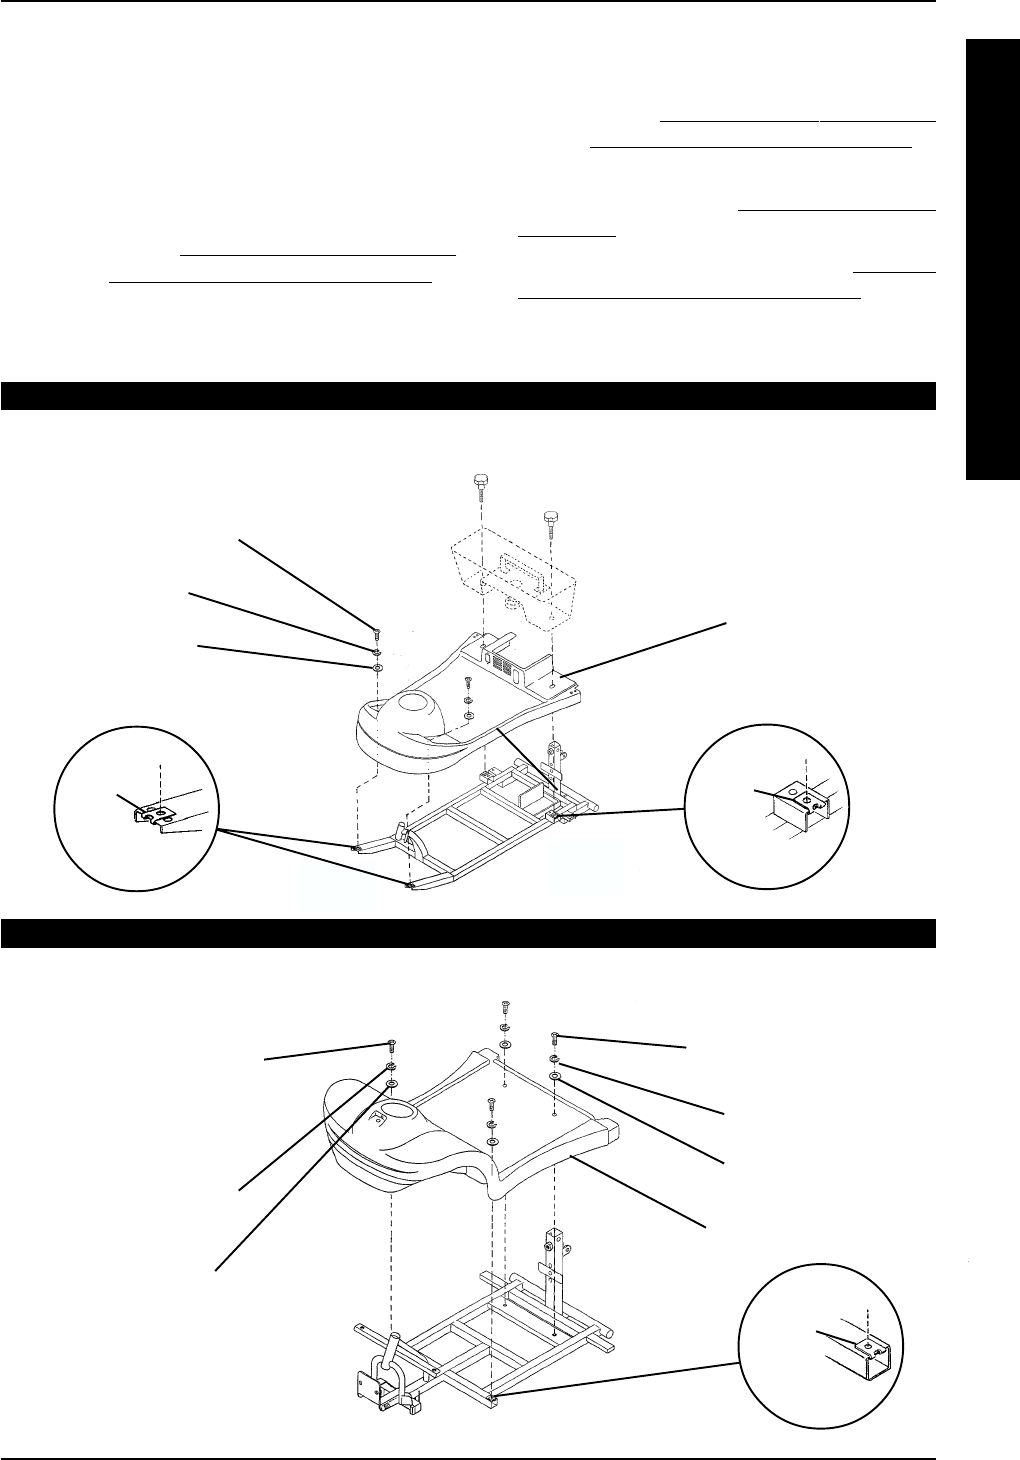
LYNX SX - 3/LYNX SX - 3P
Mounting Screw
Spring Washer
Flat Washer
Front
Shroud
Assembly
U
Type
Plate
Nut
U
Type
Plate
Nut
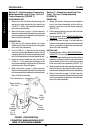
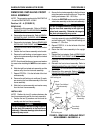
PANTHER LX - 4
FIGURE 1 - REMOVING/INSTALLING FRONT SHROUD ASSEMBLY
Mounting Screw
(Required for
PANTHER LX - 4 AND
PANTHER MX - 4)
Spring Washer
Flat Washer
Front Shroud Assembly
Spring Washer
Washer
SHROUD/FORK/WHEELS/TIE RODS PROCEDURE 5
NOTE: Only the LYNX SX - 3/LYNX SX - 3P is shown for clarity. The front shroud for the LYNX LX - 3
removes/installs in the same manner.
C. PANTHER MX - 4:
1. Reinstall the front head light assembly.
Refer to
REMOVING/INSTALLING THE
FRONT HEAD LIGHT ASSEMBLY in
PROCEDURE 11 of this manual.
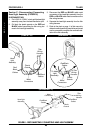
6. Reinstall the boot. Refer to
REMOVING/INSTALL-
ING BOOT in PROCEDURE 4 of this manual.
7. Reinstall the tiller assembly. Refer to
REMOV-
ING/INSTALLING TILLER ASSEMBLY in PRO-
CEDURE 4 of this manual.
8. Position the rug on the shroud assembly.
NOTE: Only the PANTHER LX - 4 is shown for clarity. The front shroud for the PANTHER MX - 4 removes/
installs in the same manner.
Mounting Screw
(Required for PANTHER
LX - 4 ONLY)
U
Type
Plate
Nut