


Installation
Apollo GX50/60/65 Installation Manual
29
Comm Flight Test Check
A flight test is recommended as a final installation verification. The performance may be
verified by contacting a ground station at a range of at least 50nm while maintaining an
appropriate altitude and over all normal flight attitudes. Performance should be checked using
low, high, and mid band frequencies.
FINAL SYSTEM CHECK
The GX50/60/65 GPS navigation functions should be complete at this time. The final check
includes checking database, entering a direct to waypoint, and checking the navigation
functions. Start with the unit turned on and operating in the normal mode. Refer to the user’s
manual for operating instructions.
1. Verify a valid position is displayed.
2. Check the database to ensure it is for the right coverage area and check the expiration
date. To check the database:
a) Press SYS, rotate the LARGE knob to the “SYSTEM INFO” page, and press ENT.
b) Rotate the LARGE knob to the Apollo GX “SOFTWARE VERSION” page
c) Rotate the SMALL knob to display the database information. The database name,
expiration date, and version will be displayed.
3. Enter a direct to waypoint. Press the DIRECT-TO button, use the LARGE and SMALL knobs
to select a nearby waypoint, then press ENT. Or use the nearest search function to select
a waypoint.
4. Verify the bearing and distance to the selected waypoint.
If the database is expired, or if a different coverage area is needed, contact the Garmin AT
factory for an update.
INTERFACE CHECKS
The interfaces to other equipment, such as the SL40 or a moving map display, should be
checked. Make sure the other equipment is connected and switched on. The Apollo GX must
have a seed position and be navigating to a waypoint to check the interfaces.
Apollo SL30
When your Apollo GX is connected to and configured to communicate with an Apollo SL30
Nav/Comm, your Apollo GX will exchange information with the SL30. If the following steps
do not perform correctly, check the electrical connections and configuration setup.
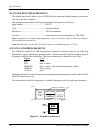
1. In the Apollo GX, view Tuned Station page in Nav mode. The tuned station identifier and
frequency sent by the Apollo SL30 should be displayed.
2. In the Apollo SL30, Distance, Speed, and Time information for the selected station should
be displayed. The Distance, Speed, and Time information for the selected station shown in
the SL30 ensures that the GX and SL30 are communicating.
If your Apollo SL30 is only configured to receive, use the following steps for checkout.
1. In the SL30, press NAV.
2. Then, press SEL.
3. Note the you should see the three to four letter designator for either the Localizer for the
destination or the closest VOR to your current position.