3541 Unit A, Lomita Boulevard, Torrance, CA 90505 (310) 325-4799
www.stoptech.com 7
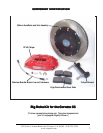
Step 1Step 1
Step 1Step 1
Step 1
RR
RR
R
aise aise
aise aise
aise
VV
VV
V
ehicle, and Rehicle, and R
ehicle, and Rehicle, and R
ehicle, and R
emoemo
emoemo
emo
vv
vv
v
e e
e e
e
WheelsWheels
WheelsWheels
Wheels
WW
WW
W
arar
arar
ar
ning: Nning: N
ning: Nning: N
ning: N
evev
evev
ev
er leaver leav
er leaver leav
er leav
e any ve any v
e any ve any v
e any v
ehicle supporehicle suppor
ehicle supporehicle suppor
ehicle suppor
tedted
tedted
ted
with only a jack. Always use jack-stands.with only a jack. Always use jack-stands.
with only a jack. Always use jack-stands.with only a jack. Always use jack-stands.
with only a jack. Always use jack-stands.
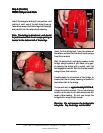
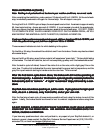
A level, stable and clean surface, suitable for sup-
porting the vehicle on jack-stands, should be
used for the installation.
For a front kit installation, apply the parking
brake, then break loose the lug nuts on both
front wheels before jacking up the vehicle.
NN
NN
N
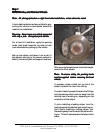
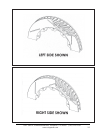
ote: All photographs show a right-hand side installation, unless otherwise noted.ote: All photographs show a right-hand side installation, unless otherwise noted.
ote: All photographs show a right-hand side installation, unless otherwise noted.ote: All photographs show a right-hand side installation, unless otherwise noted.
ote: All photographs show a right-hand side installation, unless otherwise noted.
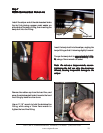
Jack up the vehicle, and secure it on a pair of
jack-stands, referring to the owner’s manual to
identify the correct jack and support locations.
After securing the vehicle at a convenient height,
remove the front wheels.
NN
NN
N
ote: Tote: T
ote: Tote: T
ote: T
o ensuro ensur
o ensuro ensur
o ensur
e safetye safety
e safetye safety
e safety
, the par, the par
, the par, the par
, the par
king brking br
king brking br
king br
akeake
akeake
ake
must be applied before removing the frontmust be applied before removing the front
must be applied before removing the frontmust be applied before removing the front
must be applied before removing the front
wheels.wheels.
wheels.wheels.
wheels.
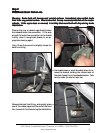
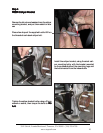
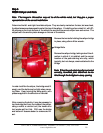
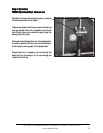
To make it easier to access the brake line fittings,
turn the steering either toward or away from the
side that you’re working on, depending on the
orientation of the caliper.
If you’re installing a leading caliper, turn the
steering toward the side that you’re working on,
and if you’re installing a trailing caliper, turn
the steering away from the side that you’re work-
ing on. This will make access to the caliper bolts
easier.
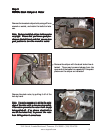
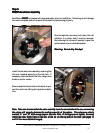
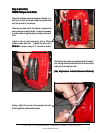
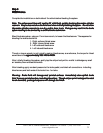
If necessary, place a wheel nut on one of the
studs, to prevent the rotor from falling.