3541 Unit A, Lomita Boulevard, Torrance, CA 90505 (310) 325-4799
www.stoptech.com 17
SS
SS
S
tep 6tep 6
tep 6tep 6
tep 6
(Cont (Cont
(Cont (Cont
(Cont
’’
’’
’
d.)d.)
d.)d.)
d.)
II
II
I
nstall Cnstall C
nstall Cnstall C
nstall C
aliper and Paliper and P
aliper and Paliper and P
aliper and P
adsads
adsads
ads
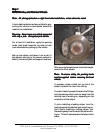
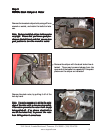
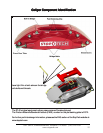
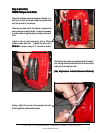
Install the caliper onto the adapter bracket, ori-
enting it so that the bleed screws are positioned
on the top side of the caliper.
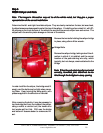
Slide the brake pads into position within the cali-
per, taking care to ensure that the friction side of
each pad is facing the rotor.
(Y(Y
(Y(Y
(Y
es, thees, the
es, thees, the
es, the
yy
yy
y
’’
’’
’
vv
vv
v
e been installed backware been installed backwar
e been installed backware been installed backwar
e been installed backwar
d beford befor
d beford befor
d befor
e!)e!)
e!)e!)
e!)
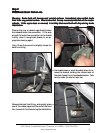
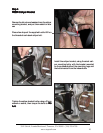
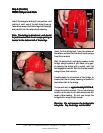
Take care to ensure that the caliper is square and
evenly started on both studs. It may be necessary
to use a mallet to gently tap the caliper into posi-
tion.
Install a Jet nut onto each stud, with a 12mm
washer under each nut. Tighten the Jet nuts to
40 lb-ft 40 lb-ft
40 lb-ft 40 lb-ft
40 lb-ft of torque, using a 1/2” wrench or socket.
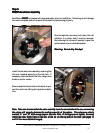
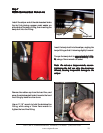
Apply a light film of anti-seize compound onto
the bridge bolt shafts and threads.