17
Sequencer
4 Press the Set button to assign the selected WAVE file to
the audio track.
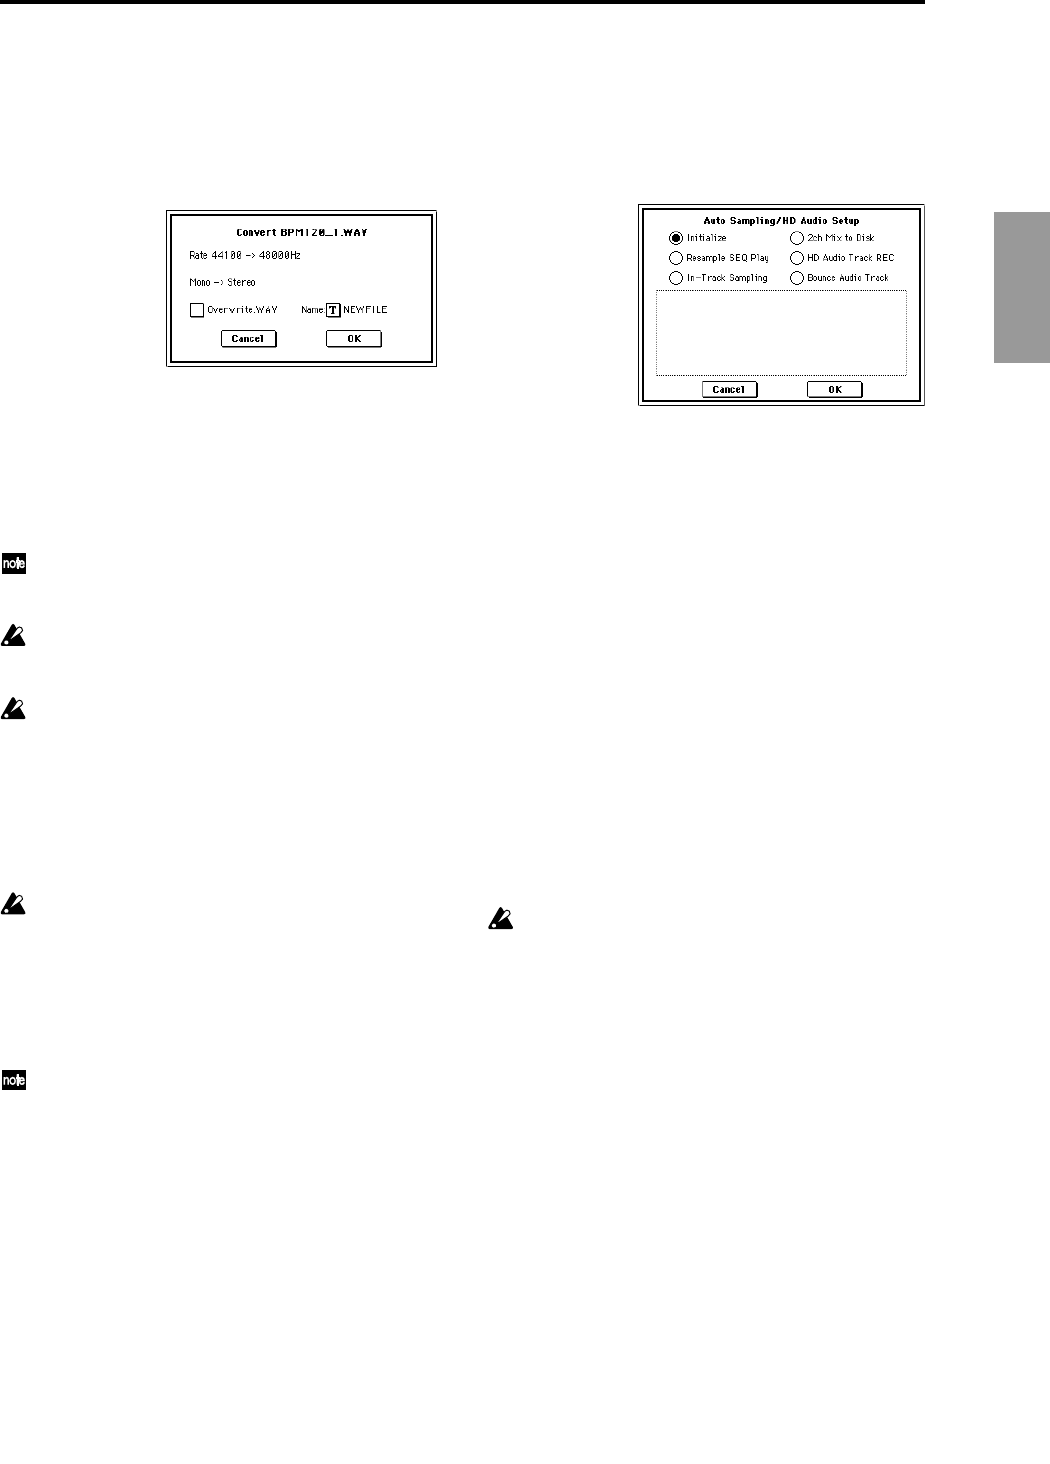
Only a 48 kHz stereo WAVE file can be assigned to the
audio track. If you select a 44.1 kHz WAVE file or a 48
kHz monaural WAVE file, the following dialog box will
appear, allowing you to convert the file to a 48 kHz stereo
WAVE file.
If you want to replace the existing file with the converted
WAVE, check “Overwrite.WAV.” If this box is not
checked, a new 48 kHz stereo WAVE file will be created,
and the original WAVE file will be preserved. If you want
to create a new file, use the “Name” field at the right to
specify a name for the file.
Press the OK button, and the WAVE file will be con-
verted to 48 kHz stereo and assigned to the audio track.
This conversion will require approximately 47 seconds
for each minute of a stereo WAVE file that is saved on
the TRITON STUDIO’s internal hard drive.
If you select a WAVE file whose sampling frequency is
other than 44.1 kHz or 48 kHz, an error message of
“Can’t convert” will be displayed.
You cannot assign a WAVE file longer than 80 minutes
to the audio track.
5 Press the Done button to complete the command.
The directory that was selected when you pressed the
Done button will be assigned as the save-destination for
the WAVE file created when you record or edit.
6 Press the SEQUENCER [START/STOP] key to play back
the audio track.
When you record or play back a song that includes an
audio track, several seconds will elapse from the
moment you press the SEQUENCER [REC/WRITE]
key or the SEQUENCER [START/STOP] key until
recording or playback actually begins. During this
interval, a dialog box will appear in the screen, and the
SEQUENCER [REC/WRITE] key or SEQUENCER
[START/STOP] key LED will blink.
If you set “Ctrl” to Audio Track, you can make audio
track output settings during playback. You can also
apply insert effects or master effects to the audio track.
(☞p.15 “0–7: Sampling/HD Audio”)
0–7C: Auto Sampling/HD Audio Setup
This command automatically sets the appropriate parame-
ters to the optimal settings for use with various Sequencer
mode sampling and audio operations.
1 Choose “Auto Sampling/HD Audio Setup” to open the
dialog box.
2 Use the radio buttons to select one of the following six
operations.
Initialize: Reset parameters related to sampling or audio
track recording to their default state.
Resampling SEQ Play: Automatically make the neces-
sary settings for resampling your keyboard performance
in Sequencer mode.
In-Track Sampling: Automatically make the necessary
settings for using the In-Track Sampling function to sam-
ple only external audio signals.
2ch Mix to Disk: Automatically make the necessary set-
tings for resampling an existing song to a stereo WAVE
file on the hard drive.
HD Audio Track REC: Automatically make the neces-
sary settings for recording to the audio track (2 ch).
Bounce Audio Track: Automatically make the necessary
settings for bounce-recording the audio tracks.
3 Press the OK button. If you decide to cancel, press the
Cancel button.
The sampling and /or HD Audio Track parameters for
the operation you selected will be set automatically.
Once you execute this command, the corresponding
parameters will be set automatically. You cannot use the
[COMPARE] key to revert to the previous settings.
For the procedure and details on each setup, refer to “Auto
Sampling/HD Audio Setup” (☞p.28).
0–7D: Bounce All Tracks To Song
This command bounce-records all tracks - MIDI and audio -
of the current song to the audio track of a new song.
When using this command, simply specify the bounce-
recording destination song in the dialog box and press the
OK button. All of the necessary settings and the bounce-
recording operation will be performed automatically.
1 In the Sequencer P0: Play/REC, Sampling/HD Audio”
page, choose the page menu command “Bounce All
Tracks To Song” to open the dialog box.
