


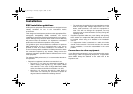


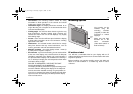


Installation 17
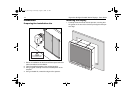
IMPORTANT: The gasket must lay flat against the aperture
edge to ensure watertight integrity.
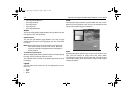
2. Place the mounting bracket lugs into the keyways (a) and
move them to the rear (b), securing the bracket to the
monitor.
Note: The mounting brackets can be used in either the hori-
zontal or vertical keyways as required.
3. Using a suitable screwdriver, tighten the mounting bracket
screws to secure the monitor in position.
4. Connect all cables as required - see “Rear connections” on
this page.
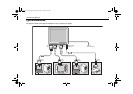
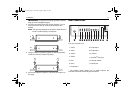
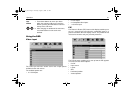
Rear connections
The rear connectors are:
* The selector switch enables you to switch between the
SeaTalk
hs
/ Ethernet and Serial port connections.
a
b
1. Power 8. Composite 2
2. VGA 1 9. Composite 3
3. VGA 2 10. S-Video
4. VGA 3
11. SeaTalk
hs
/ Ethernet
5. DVI 1 12. Selector switch*
6. DVI 2 13. Serial port
7. Composite 1
1 32 4 5 6 7 8 9 10 11 12 13
81277_1.book Page 17 Thursday, August 17, 2006 1:51 PM