


MAINTENANCE
2.14
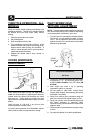
Maintenance--Free batteries are permanently
sealed at the time of manufacture. The use of
lead--calcium and AGM technology instead of
lead--antimony allows the battery acid to be fully
absorbed. For this reason, a Maintenance--Free
battery case is dark and the cell caps are not
removable, since there is no need to check
electrolyte level.
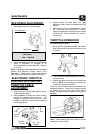
NEVER attem pt to a dd electrolyte or water to a
Maint e na nc e--Fre e batte r y. Doing so will dama ge
the case and shorten the life of the battery. Refer
to the Battery Maintenance Video (PN 9917987) for
prope r inst r uc tion on servic ing Mainte na nc e--Free
batteries .
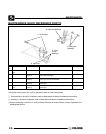
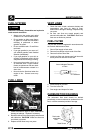
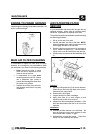
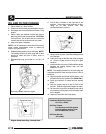
The battery is located under the left rear fender.
A
B
Battery
To remove the battery:
1. Disconnect holder strap (A) and remove cover
(B).
2. Disconnect battery negative (-) (black) cable first,
followed by the positive (+) (red) cable.
CAUTION
To reduce the chance of sparks: Whenever
removing the battery, disconnect the negative
(black) cable first. When reinstalling the battery,
install the negative cable last.
3. Remove the battery.
4. Clean battery cables and terminals with a stiff wire
brush. Corrosion can be removed using a
solution of one cup water and one tablespoon
baking soda. Rinse well with clean water and dry
thoroughly.
5. Reinstall battery, attaching positive (+) (red) cable
first and then the negative (-) (black) cable.
6. Coat terminals and bolt threads with Dielectric
Grease (PN 2871329).
7. Reinstall battery cover and holder strap.
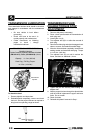
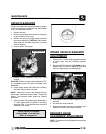
SPARK PLUG
1. Remove spark plug high tension lead. Clean plug
area so no dirt and debris can fall into engine
when plug is removed.
2. Remove spark plug.
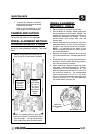
3. Inspect electrodes for wear and carbon buildup.
Look for a sharp outer edge with no rounding or
erosion of the electrodes.
4. Clean with electrical contact cleaner or a glass
bead spark plug cleaner only. CAUTION: A wire
brush or coated abrasive should not be used.
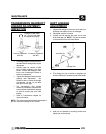
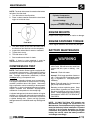
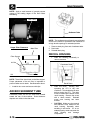
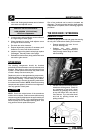
5. Measure gap with a wire gauge. Refer to
specifications for proper spark plug type and gap.
Adjust gap if necessary by bending the side
electrode carefully .
.036² (.9 mm)
Spark Plug Gap
6. If necessary, replace spark plug with proper type.
CAUTION: Severe engine damage may occur if
the incorrect spark plug is used.
7. Apply a small amount of anti-seize compound to
the spark plug threads.
8. Install spark plug and torque to 14 ft. lbs.
Recommended Spark Plug:
NGK BKR6E
Spark Plug Torque: 14 Ft. Lbs. (19 Nm)
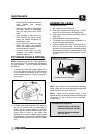
IGNITION TIMING
Refer to Electrical chapter for ignition timing
procedure.
Ignition Timing:
30°
°°
°±
±±
±2°
°°
° BTDC@5000RPM