


32 C4659M (4/10)
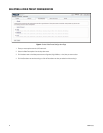
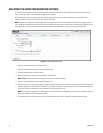
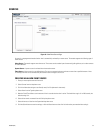
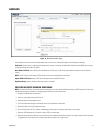
CREATING A NEW GROUP
1. Place your mouse pointer over the Users and Groups tab.
2. Select Groups from the drop-down menu.
3. Click in the Group Name box and type a name for the group you are creating (2 to 23 alphanumeric characters).
4. Click in the Description box and type a description for the group you are creating (2 to 23 alphanumeric characters).
5. Select the appropriate check boxes to choose the permissions you want to assign to this group.
6. Click the Save button to save the settings and create a new group; the new group profile appears in the box on the left side of the page.
Click the Reset button to clear all of the information you entered without saving it.
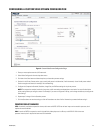
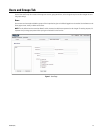
EDITING A GROUP
1. Place your mouse pointer over the Users and Groups tab.
2. Select Groups from the drop-down menu.
3. Click the group profile that you want to edit from the box on the left side of the page.
4. Double-click in each of the text boxes to highlight the text. Type the new information in each text box.
5. Select or clear the appropriate check boxes from the groups list.
6. Click the Save button to save the settings, or click the Reset button to clear all of the information you entered without saving it.
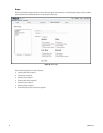
DELETING A GROUP
1. Place your mouse pointer over the Users and Groups tab.
2. Select Groups from the drop-down menu.
3. Click the group profile that you want to delete from the defined group section located in the box on the left side of the page.
4. Click the Delete Group button. A dialog box appears with the message “Are you sure you want to delete the group?”
5. Click OK. The group profile is deleted from the defined group profile section.
NOTES:
• If a user has only one group assigned and that group is deleted, the user will lose all permissions. An administrator will have to assign a
new group to that user to establish permissions.
• The Administrators and Public groups cannot be deleted.