2 – Set Up
DL™ User Manual Rev 3 15
2 - SET UP
Setting up the DL is a straightforward process, whether you are in the field (collecting data) or back at the office
(configuring the DL, or transferring collected data to your PC for post-processing).
See CAUTION!, Page 9, for a list of items you should be aware of as you set up and use the DL.
SETTING UP AT THE OFFICE
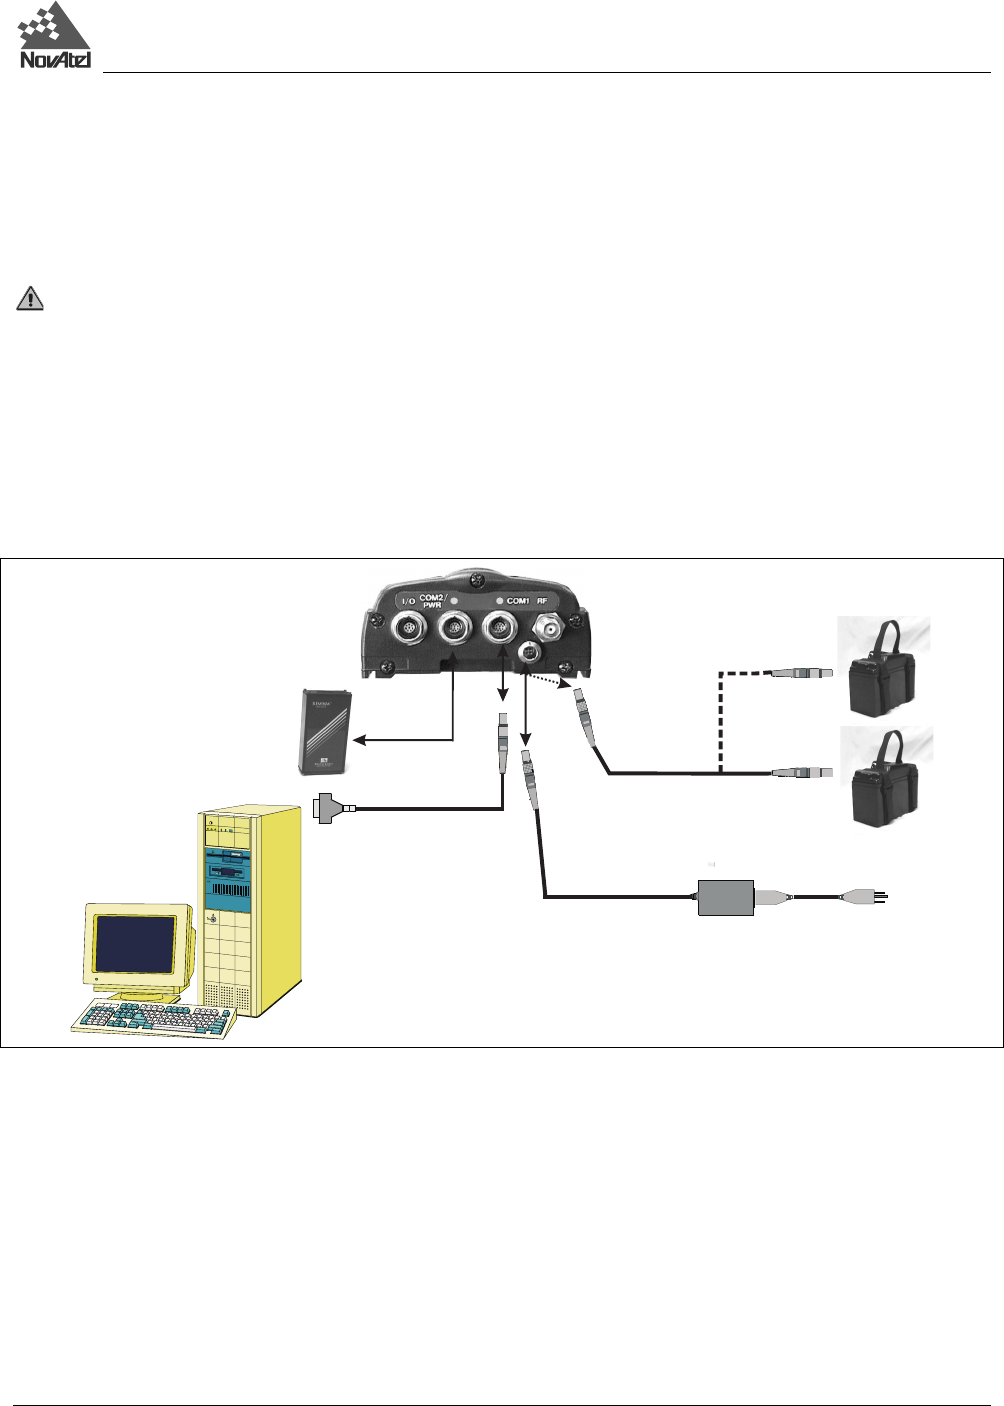
Figure 2 displays how you might typically set up the DL at the office – for example, to load a schedule, or to transfer
collected data to a PC. In this situation, the PC is connected to the COM1 port, and energy is supplied by means of an
AC/DC converter that is connected to the Power port.
Figure 2: Typical DL Configuration – Office
For office work, a typical configuration would result from the following steps:
1. Place the DL on a desk or other suitable work surface.
2. Connect an RS232C communication terminal (e.g. PC, data logger) to one of the serial ports of the DL. The supplied
null-modem cables are intended for RS232C communications only. See Serial Ports & Cables, Page 20.
3. Connect the output of a power source (e.g. AC/DC converter) to the input power port of the DL. Once power is
supplied, the DL turns on automatically and begins an initialization sequence. See Power Port & Cable, Page 22.
4. Press the power button or, if you are connected to the DL via a terminal, hit the <Enter> key and wait for a MSGA
log with a BOOTOK message to appear. If you are you are using SoftSurv to communicate with the DL, this initial
communication is handled by the software.
5. Communicate with the DL, transfer data to the PC (if you have inserted a PC Card containing previously recorded
data), or set up a data-collection schedule.
The sections of this chapter give further details on Steps #2 & #3, while Chapter 3 is devoted to Step #4.
