


Engine Assembly
59
Engine Reassembly
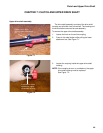
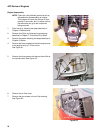
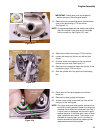
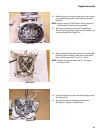
1. Rotate the crankshaft to top dead center (crank pin at
the top). See Figure 8.15.
NOTE: There are no timing marks on the crankcase.
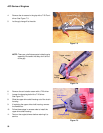
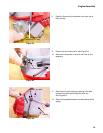
2. Install the cam onto the cam bracket.
• The side of the cam with the hash marks on it
faces away from the cam bracket.
• Lubricate the cam bearing surface with a small
amount of lithium grease.
• Install the cam followers.
• Apply a dab of lithium grease to the cam follower
pivot as a pre-lube.
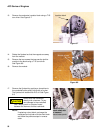
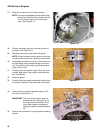
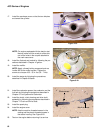
3. Install the cam bracket assembly aligning the timing
mark with the crankcase.
NOTE: The timing marks on the cam gear should be paral-
lel with the top surface of the crankcase.
See Figure 8.16.
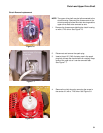
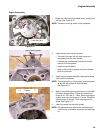
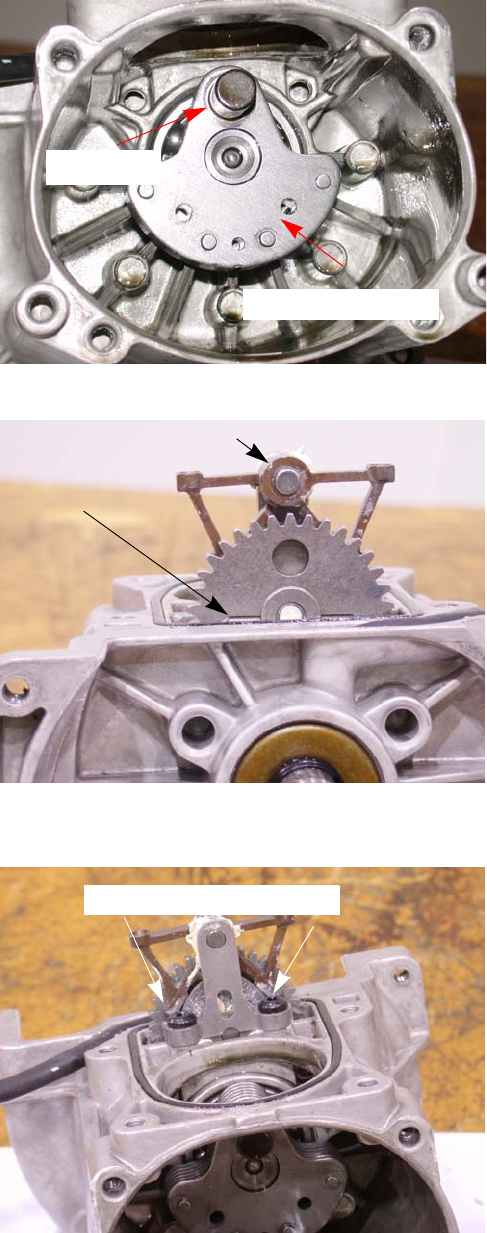
4. Apply a thread locking compound such as Loctite 266
to the cam bracket crews. Tighten the screws to a
torque of 30 - 35 in lbs (3 - 4 Nm). When torquing the
screws, torque the first screw to 15 in lbs. Torque the
second screw all the way. Finish torquing the first
screw. See Figure 8.17.
5. Insert the valves into the valve guides.
NOTE: Pre-lube each valve stem with a couple drops of
10w30 motor oil to before putting the valve springs
on.
Figure 8.15
Crank pin
Crank shaft arm
Figure 8.16
Timing mark
Apply lithium grease
Figure 8.17
1,3
2
Tighten