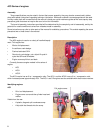
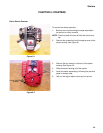
Fuel System And Carburetor
37
Disassembly of the carburetor
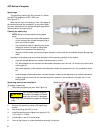
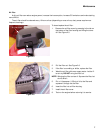
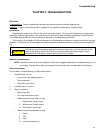
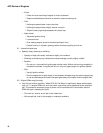
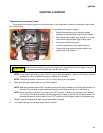
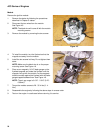
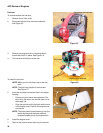
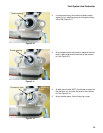
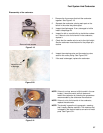
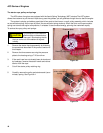
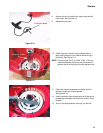
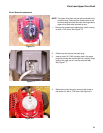
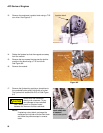
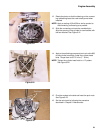
1. Remove the four screws that hold the carburetor
together. See Figure 5.19.
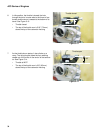
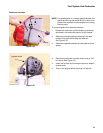
2. Separate the carburetor, placing each part on the
bench in the order they came apart.
3. Inspect the diaphragms. If torn, damaged or brittle
install a diaphragm kit.
4. Inspect for dirt or varnish build up inside the carbure-
tor. If there is a lot of dirt/varnish in the carburetor,
replace it.
5. Check that the needle valve is set to the right height.
See the carburetor manufacturer for the proper pro-
cedure.
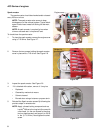
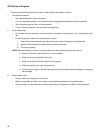
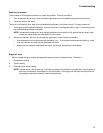
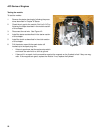
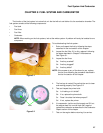
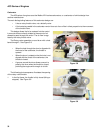
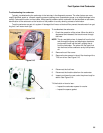
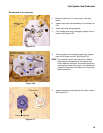
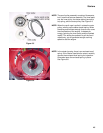
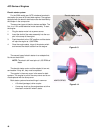
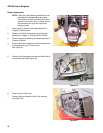
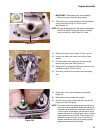
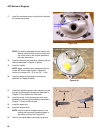
6. Inspect the metering valve and the metering valve
seat for dirt and/or pitting. See Figure 5.20.
7. If the seat is damaged, replace the carburetor.
NOTE: If there is a minor amount of dirt/varnish in the car-
buretor, it would be worth while to clean and
rebuild the carburetor by following the procedures
recommended by the carburetor manufacturer.
NOTE: If there is a lot of dirt/varnish in the carburetor,
replace the carburetor.
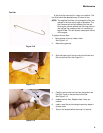
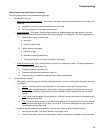
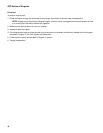
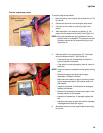
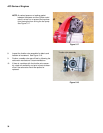
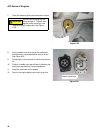
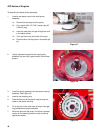
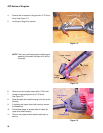
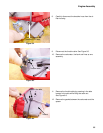
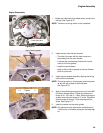
NOTE: The alcohol in gasoline is hygroscopic, meaning
that it readily absorbs moisture. The moisture that
is trapped in the alcohol leads to corrosion of metal
parts. See Figure 5.21.
Figure 5.19
Remove these screws
Figure 5.20
Inspect for dirt
or damage
Figure 5.21
Rust