


51
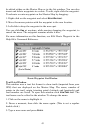
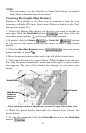
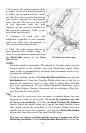
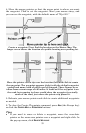
Finished corridor map.
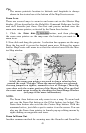
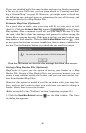
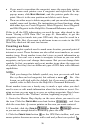
7. Now move the mouse pointer off at
an angle, in the new direction needed
to follow the irregular terrain. You'll
see that the active corridor border box
now rotates around the last anchor
point you set. This lets you move off
in any direction, with the new
segment of the corridor attached to
the previous segments. Click to set
your third anchor point.
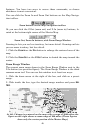
8. Continue to click and add
additional segments to your corridor
until you reach your destination or
have enclosed the desired area.
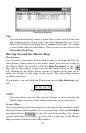
9. Click the right mouse button to
stop drawing the corridor map. To
close the map borders command, click
the
CENTER MAP button or the ZOOM
AREA button.
NOTE:
Corridor width is adjustable. The default is 12 miles wide, and the
setting reverts to the default each time MapCreate starts. Mini-
mum width is approximately six miles and maximum width is ap-
proximately 400 miles.
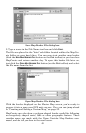
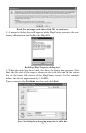
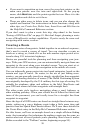
To adjust corridor width, click
VIEW|MAP DISPLAY OPTIONS and click the
MAP BORDERS tab. Drag the Corridor Width slider bar to the left to
narrow the corridor or drag it to the right to widen, then click
OK.
For more information, see the Help Command Reference topics
View Map Display Options Command and its subtopics, Map Bor-
ders Tab and Corridor Width.
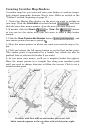
Tip:
If you need to start over, you can erase a corridor border box one
segment at a time, or all at once. To erase by segment, use one
of these two methods: (1) Click the
DRAW CORRIDOR MAP BORDERS
button. Move the pencil point over one of the small handle boxes
that appear along the centerline of the corridor. Right-click on a
handle box to erase that segment. (2) Click the
DELETE MAP BORDER
button and then click one of the small handle boxes.
To erase an entire corridor border at once, choose one of the
following methods: Click
FILE|NEW|NEW MAP BORDER FILE or click the