


24
Navigation Page and Map Page.) Each page represents one of the unit's
major operation modes.
3. MENU – Press this key to show the menus and submenus, which
allow you to select a command or adjust a feature. This also accesses
search functions for streets, intersections, addresses and highway exits.
4. ARROW KEYS – These keys are used to navigate through the
menus, make menu selections, move the map cursor and enter data.
5. ENT/ICONS (Enter & Icons) – This key allows you to save data, ac-
cept values or execute menu commands. It is also used to create event
marker icons.
6. EXIT – The Exit key lets you return to the previous screen, clear
data or erase a menu.
7. WPT – (Waypoint) The Waypoint key is used to save and recall way-
points, search for waypoints and access the waypoint list. It also
launches the Point-of-Interest (POI) search menus and is involved in
some navigation functions.
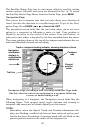
8. ZOUT – (Zoom Out) – This key lets you zoom the screen out. This
lets you see a larger geographic area on the map. Less detail is seen as
you zoom out.
9. ZIN – (Zoom In) – This key lets you zoom the screen in. Zooming in
lets you see greater detail in a smaller geographic area on the map.
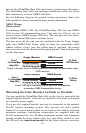
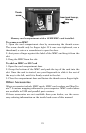
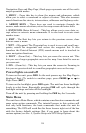
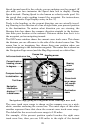
Power/lights on and off
To turn on the unit, press PWR. As the unit powers up, the Map Page is
displayed first. (To switch to another page, press
PAGES|← or → to
Page Name|
EXIT.)
To turn on the backlight, press PWR again. The unit has three backlight
levels to select from. Repeatedly pressing
PWR will cycle through the
backlight settings and turn off the backlight.
Turn off the unit by pressing and holding the
PWR key for 3 seconds.
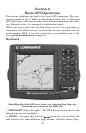
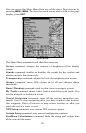
Main Menu
The unit has a Main Menu, which contains some function commands and
some setup option commands. The tutorial lessons in this section will
deal only with functions, the basic commands that make the unit do
something. The GPS will work fine for these lessons right out of the box
with the factory default settings. But, if you want to learn about the
various options, see Sec. 5, System Setup and GPS Setup Options.