


2. RADAR OPERATION
2-30
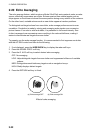
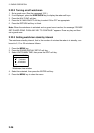
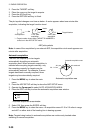
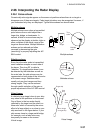
Automatic acquisition area
45° port
45° starboard
2.0 - 2.5 nm
Automatic acquisition area
2. Press the TARGET soft key.
3. Place the cursor on the target to acquire.
4. Press the ACQ soft key.
5. Press the RETURN soft key to finish.
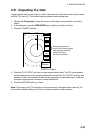
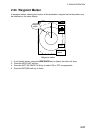
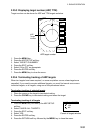
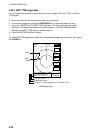
The plot symbol changes over time as below. A vector appears about one minute after
acquisition, indicating the target’s motion trend.
At acquisition 1 min. after
acquisition
3 min. after
acquisition
01*
01*
01*
Vector
* = Target number shown when TARGET ID NUMBER is
turned on in the ARP SETUP menu.
Target Number
ARP plot symbols
Note: In case of the acquisition by an external ARP, the acquisition circle mark appears one
minute after acquisition.
Automatic acquisition
The ARP can acquire up to ten targets
automatically by setting an automatic
acquisition area. When automatic acquisition is
selected after acquiring targets manually, only
the remaining capacity for targets may be
automatically acquired. For example, if seven
targets have been manually acquired, three
targets may be automatically acquired.
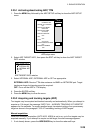
1. Press the MENU key to show the main
menu.
2. Press the ARP SETUP soft key to show the ARP SETUP menu.
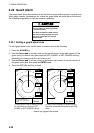
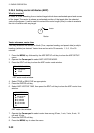
3. Operate the Cursor pad to select AUTO ACQUISITION AREA.
4. Press the EDIT soft key to show the automatic acquisition area window.
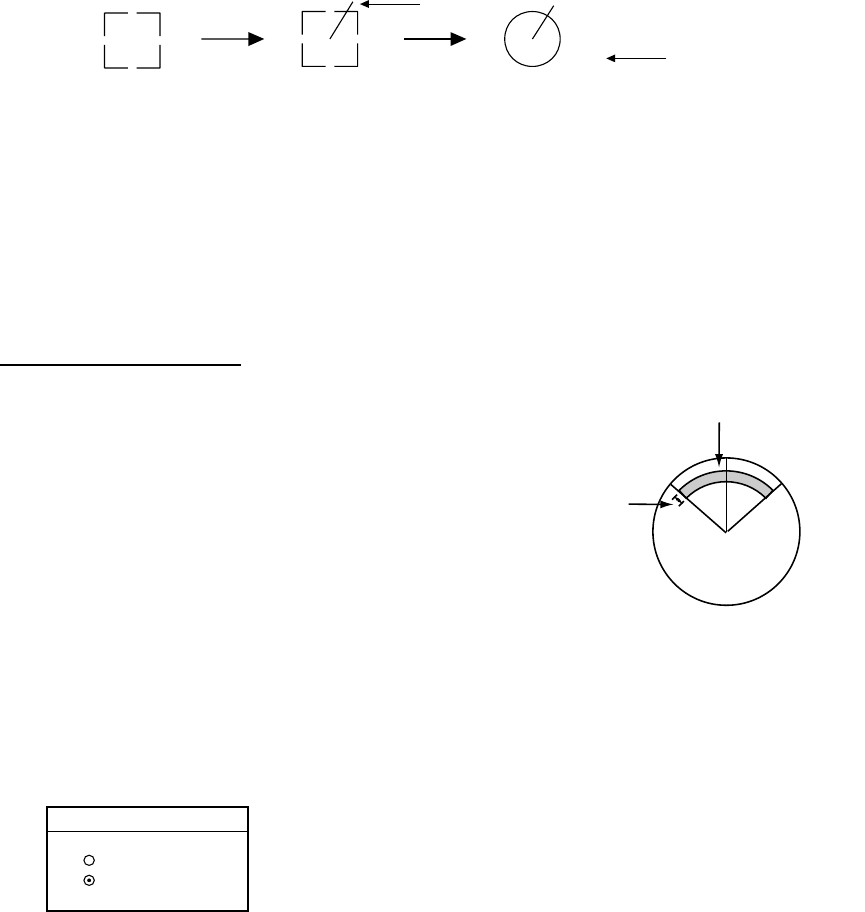
AUTO ACQ. AREA
▲
▼
ON
OFF
Automatic acquisition area window
5. Select ON, then press the ENTER soft key.
6. Press the MENU key to close the menu. An acquisition area of 2.0 to 2.5 miles in range
and ±45º on either side of the heading line in bearing appears.
Note: Targets being tracked in automatic acquisition are continuously tracked when
switching to manual acquisition.